Kitchen Visualizer
In simple words
The Kitchen Visualizer is a page on your website where a shopper uploads a photo of their own kitchen, picks one of your cabinet doors, and sees an AI preview of their kitchen with that door. It carries your name, colours and door catalog, so the shopper never leaves your website. Before the preview is made, the shopper gives their name, email and phone number, so every preview is also a new lead for your team.
The problem it solves
Most shoppers find it hard to picture a door style in their own kitchen from a small product photo. They hesitate, ask for samples of many doors, or leave to look at other websites. Showing them their own kitchen usually needs a designer to mock it up by hand, which takes time and only happens after the shopper has already contacted you.
What happens without it
| If you do not have the Kitchen Visualizer | What it means for your business |
|---|---|
| Shoppers only see small door photos | They cannot picture the door in their kitchen and delay the decision |
| Mock-ups are made by hand | Your designers spend time on shoppers who may never buy |
| No reason to leave contact details early | Many visitors browse and leave without becoming a lead |
| Sample requests for many doors | More samples to post, and a slower decision |
| Shoppers try other websites' tools | You lose them to a supplier who shows them their kitchen first |
Time you save
| Task | The manual way | With the Kitchen Visualizer | You save |
|---|---|---|---|
| Show a shopper a door in their kitchen | A designer prepares a mock-up after the shopper gets in touch | The shopper makes the preview themselves in 30–90 seconds | Designer time on every early enquiry |
| Collect the shopper's details | Hope they fill in a separate contact form | Name, email and phone are given before the preview is made | More leads from the same visitors |
| Send the design to the shopper | Export it and email it by hand | The design is emailed to the shopper automatically | No manual emailing |
| Help the shopper order the right sample | The shopper searches for the door again | Order Sample Now opens your Order Samples page with that door already chosen | Fewer wrong or extra samples |
Your process, before and after
Shopper looks at door photos → cannot picture them → maybe contacts you → designer prepares a mock-up → shopper decides days later, or not at all.
Shopper uploads a kitchen photo → picks your door → leaves their details → sees their own kitchen in about a minute → orders a sample or books a call. Your team gets the lead with both photos attached.
Each client has a monthly limit on designs, and an email address can be used once a month. When the monthly limit is reached, the Generate my kitchen button is disabled.
Who uses it
- Shoppers — try your doors on their own kitchen, on your website
- Sales executives — follow up the leads, already knowing which door the shopper likes
- Marketing team — use the visualizer to turn website visitors into leads
When to use it
- Promote it in ads and emails as a free "see your new kitchen" tool
- Link to it from door and product pages, where shoppers are deciding
- Check the new visualizer leads every day, while the shopper is still interested
What each part does for you
| Part of the screen | How it helps you |
|---|---|
| Photo upload | The shopper uses their own kitchen, which makes the preview personal |
| Shop door styles | Shows your real doors, with filters and search by style name or SKU |
| Contact details pop-up | Captures the shopper as a lead before the design is made |
| After, Before and Compare views | The shopper sees the change clearly, with a slider between old and new |
| Schedule a Call | Opens your booking or Contact Us page |
| Order Sample Now | Opens your Order Samples page with the previewed door already chosen |
| Try another style | Lets the shopper compare more of your doors |
Step-by-step guide
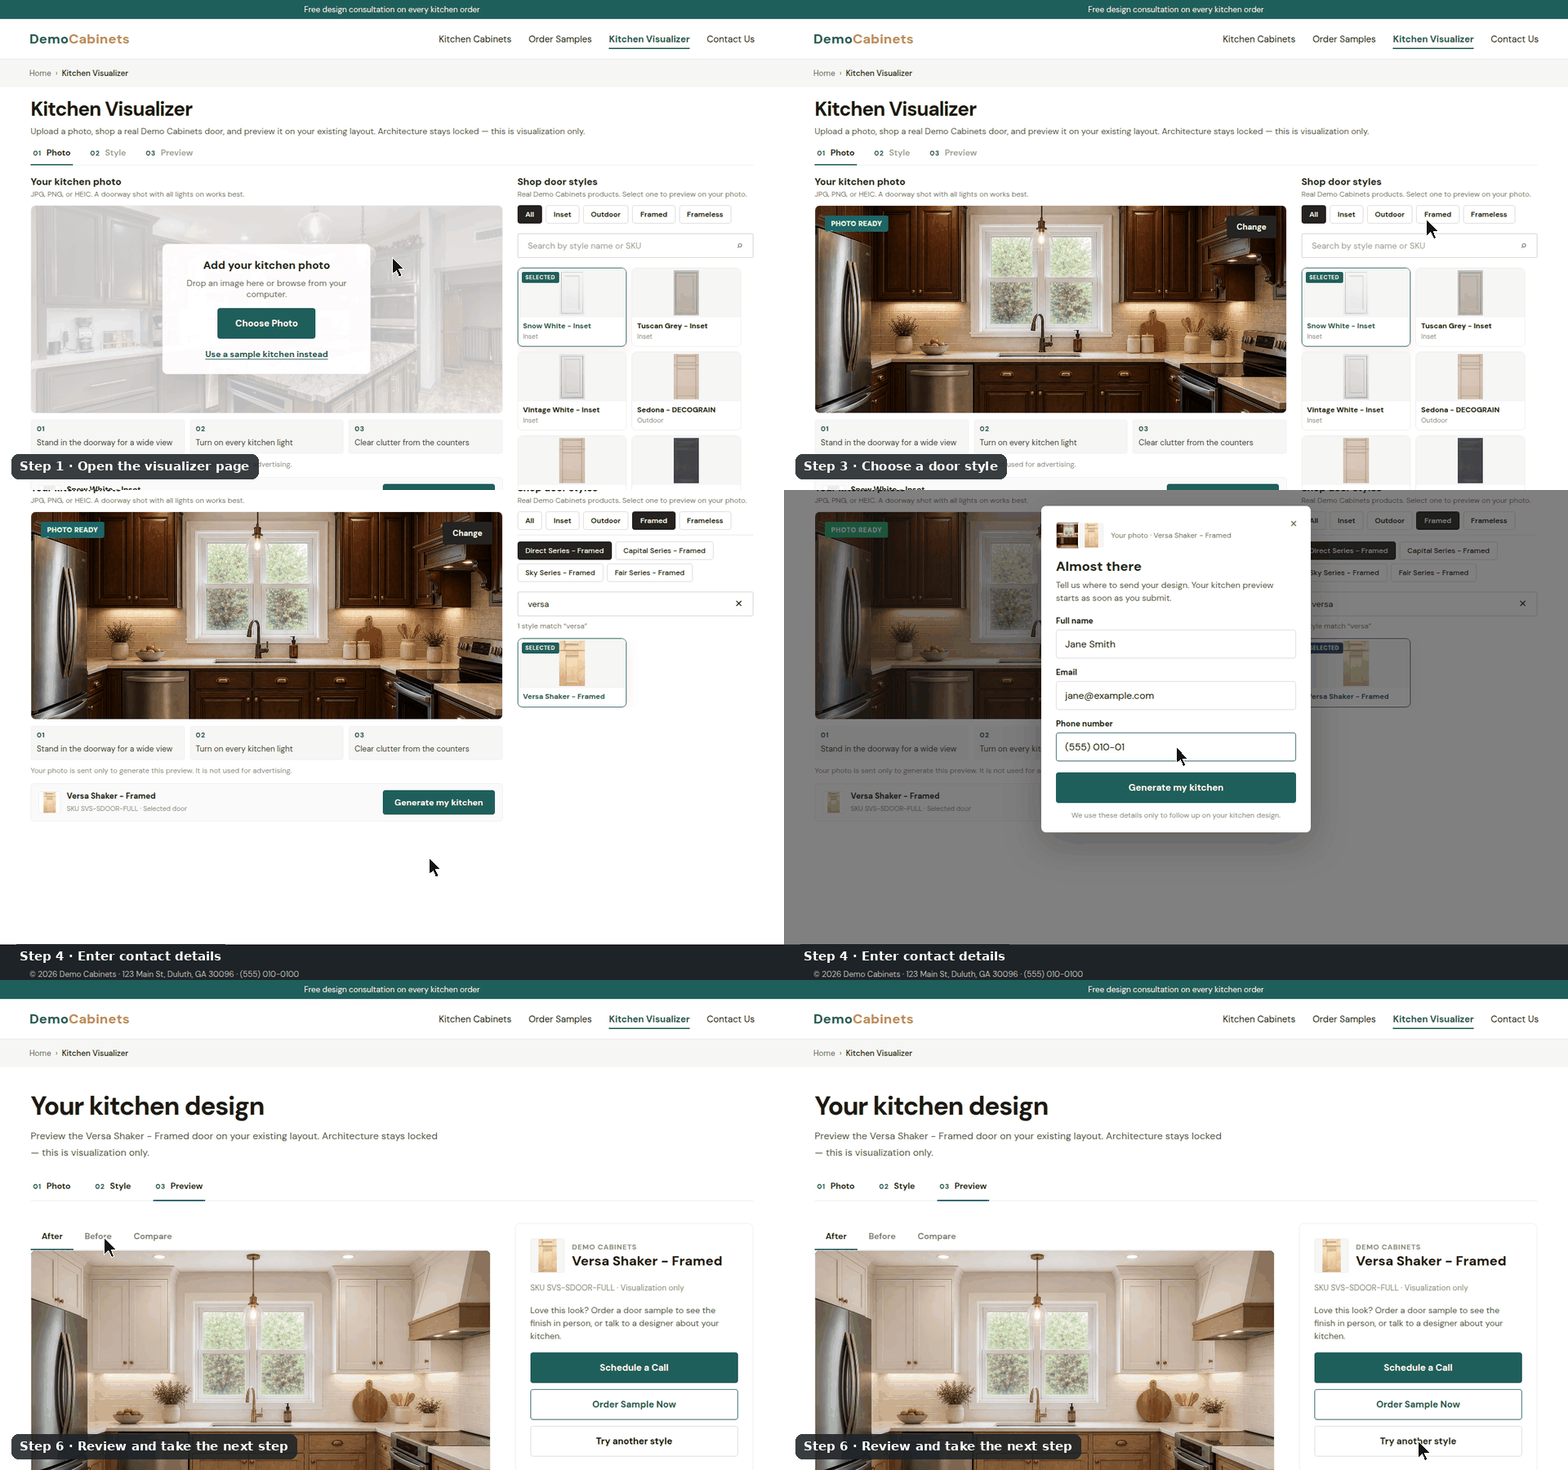
The recordings below were made on a demo website ("Demo Cabinets") with a real door catalog. The AI result in step 5 is a stand-in image.
Step 1: Open the visualizer page
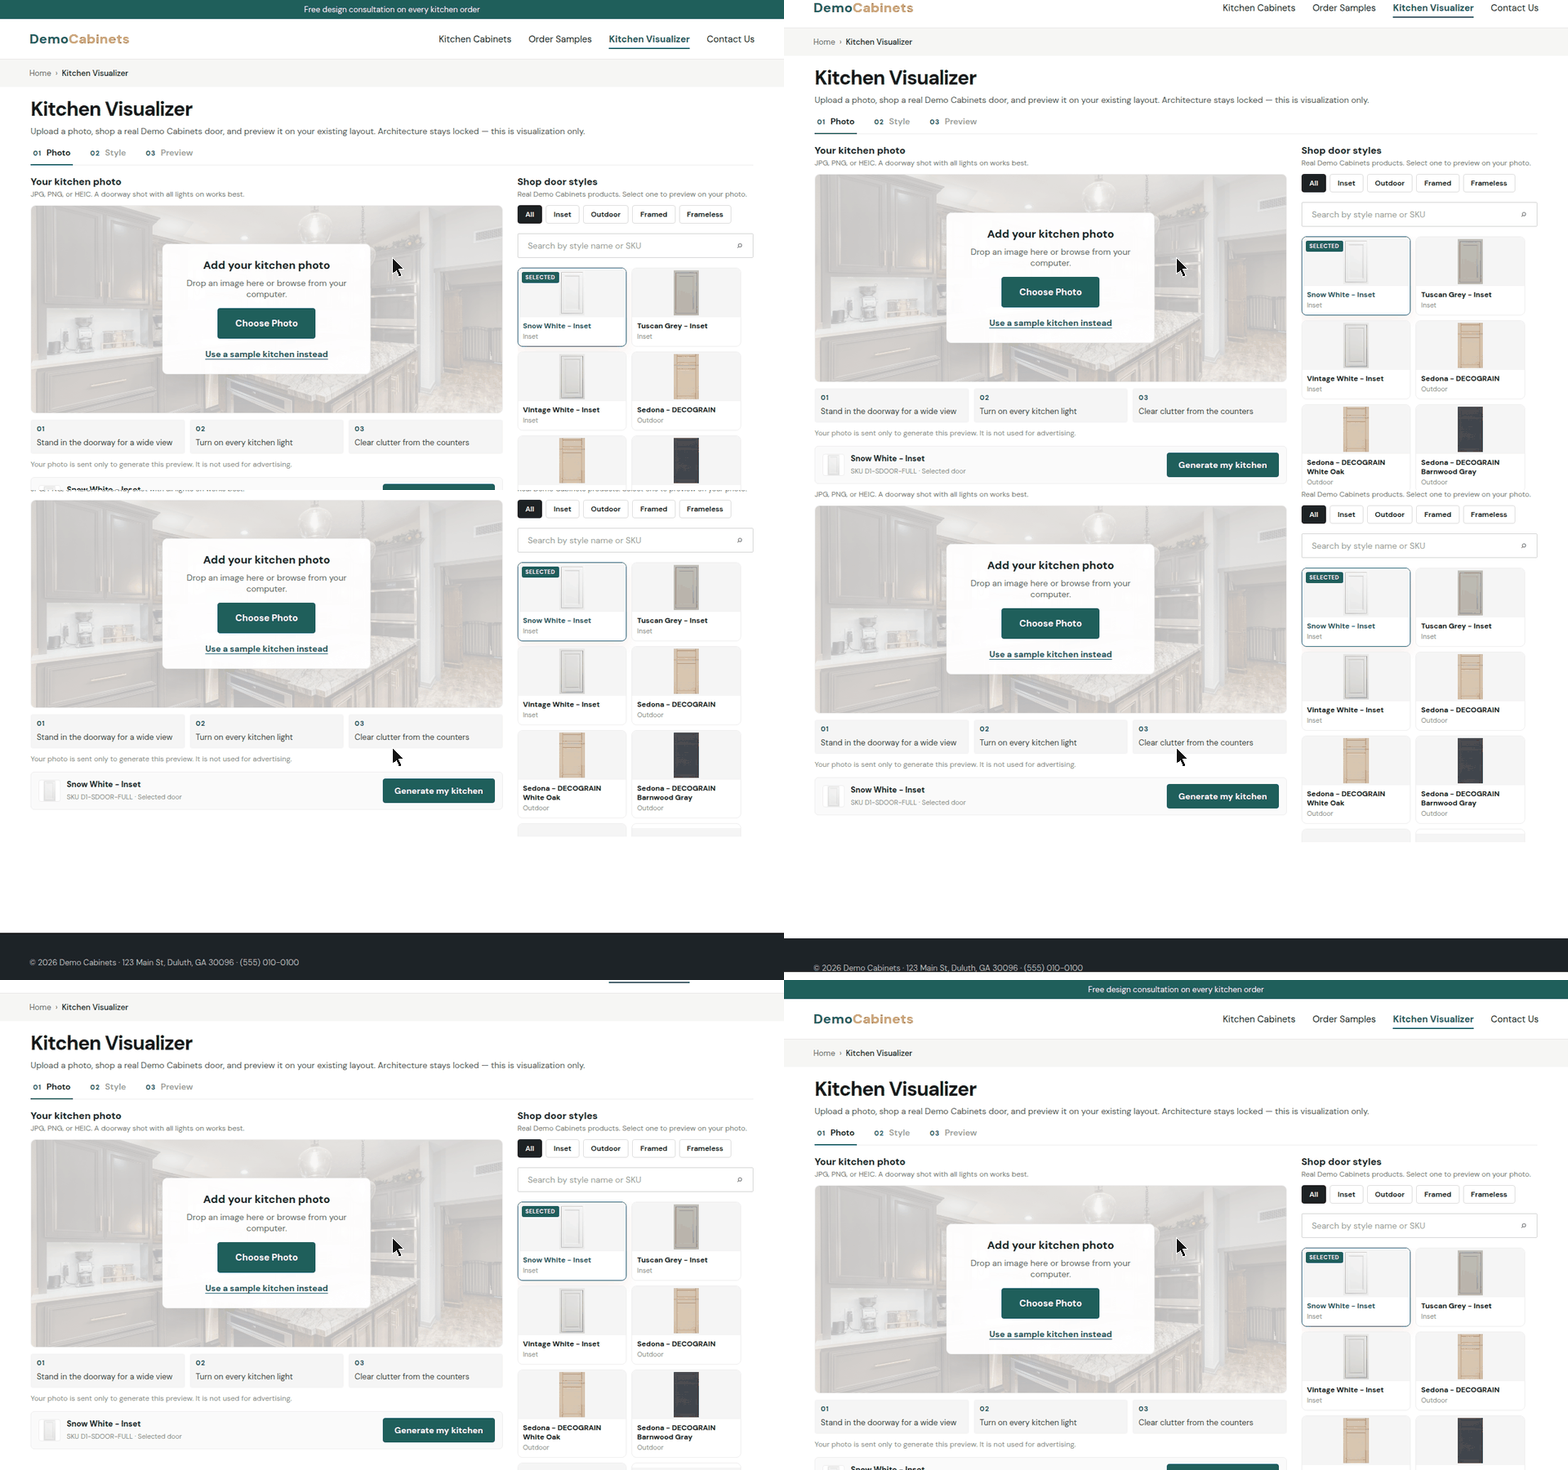
The shopper opens the Kitchen Visualizer page on your website (usually /visualizer/). Your header, breadcrumb and footer stay in place, and the tool uses your brand colour, font, name and door catalog. There are three steps across the top: 01 Photo, 02 Style, 03 Preview.
Step 2: Add a kitchen photo
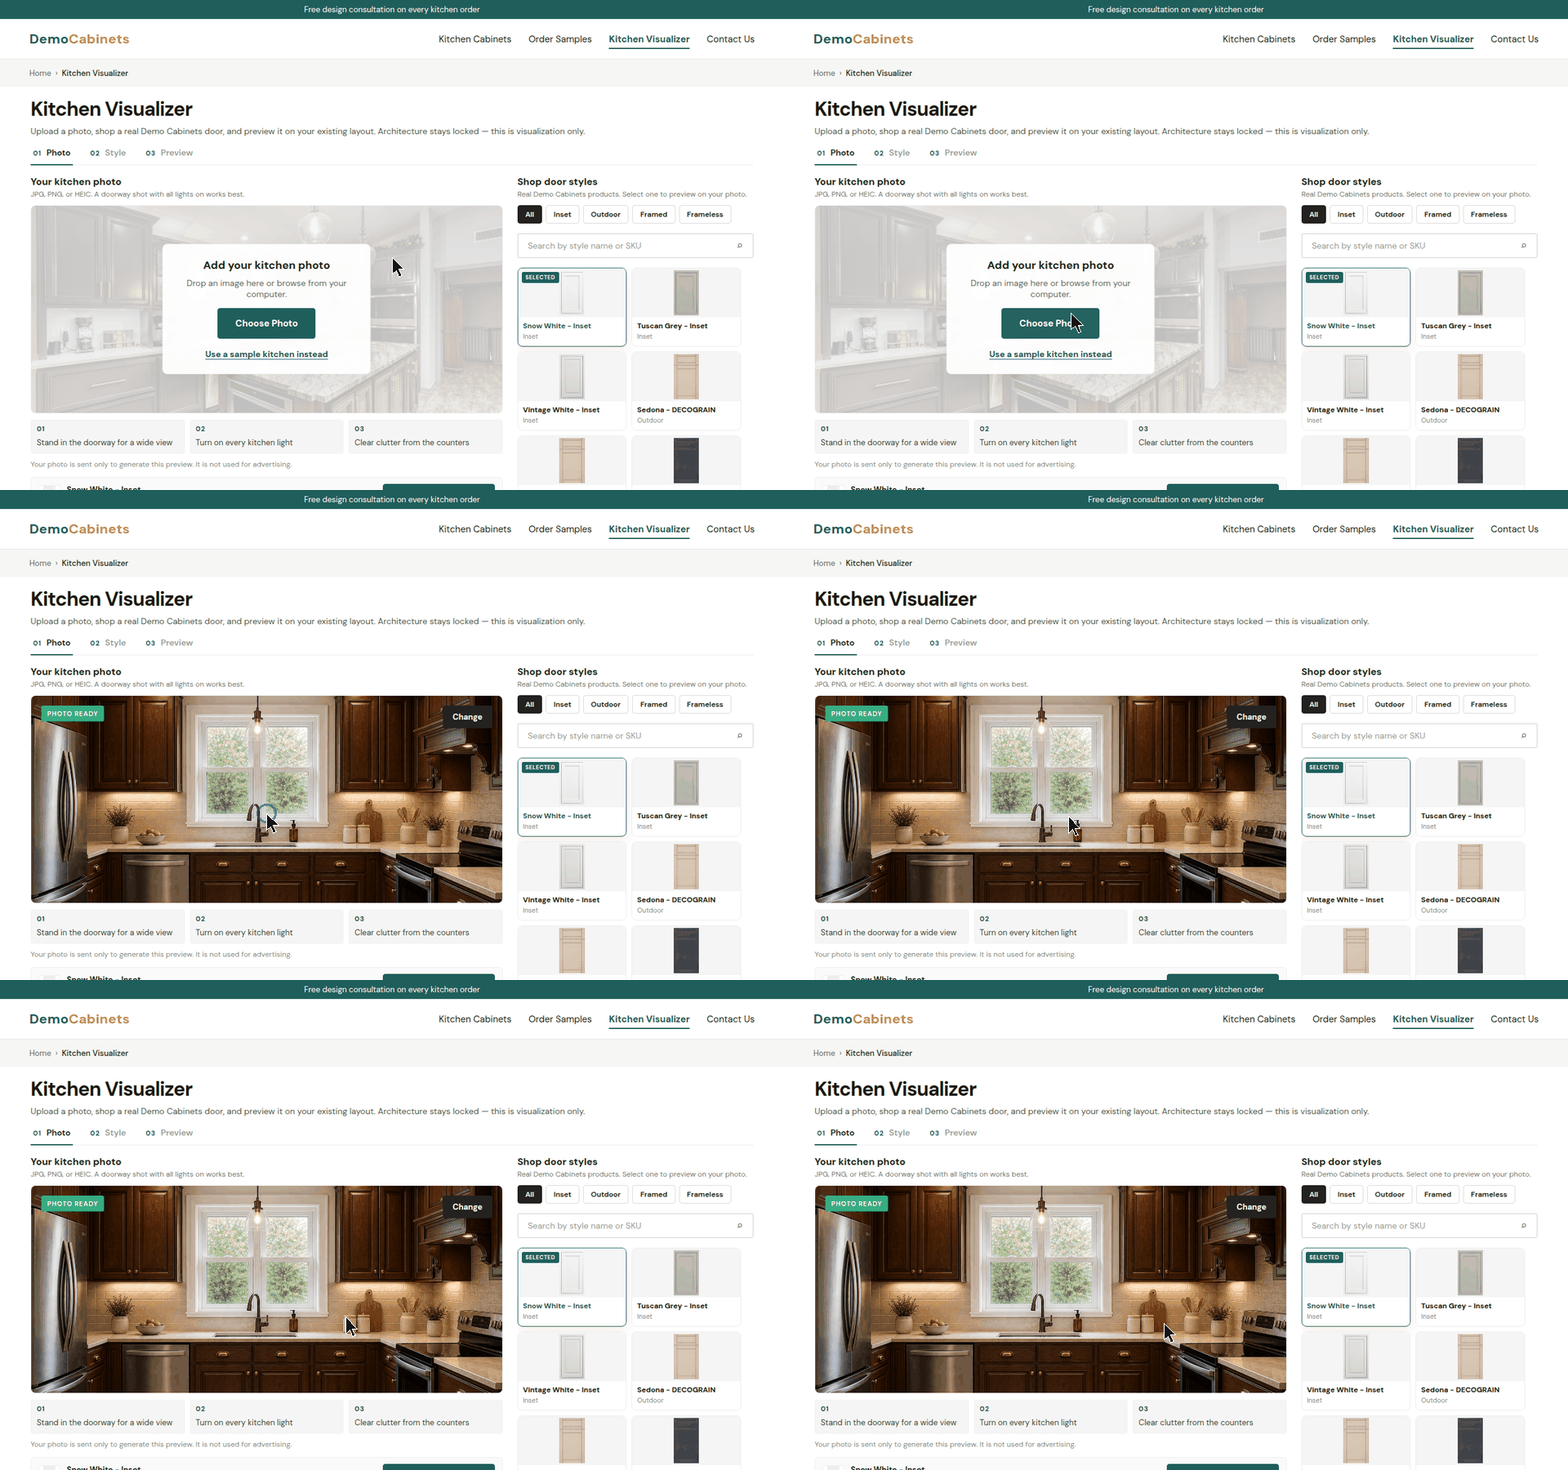
The shopper clicks Choose Photo (or drags an image onto the box) and picks a photo of their kitchen. JPG, PNG and HEIC all work. A Photo ready badge confirms the upload, and Change swaps the photo. If the shopper has no photo to hand, Use a sample kitchen instead loads a built-in one.
Step 3: Choose a door style
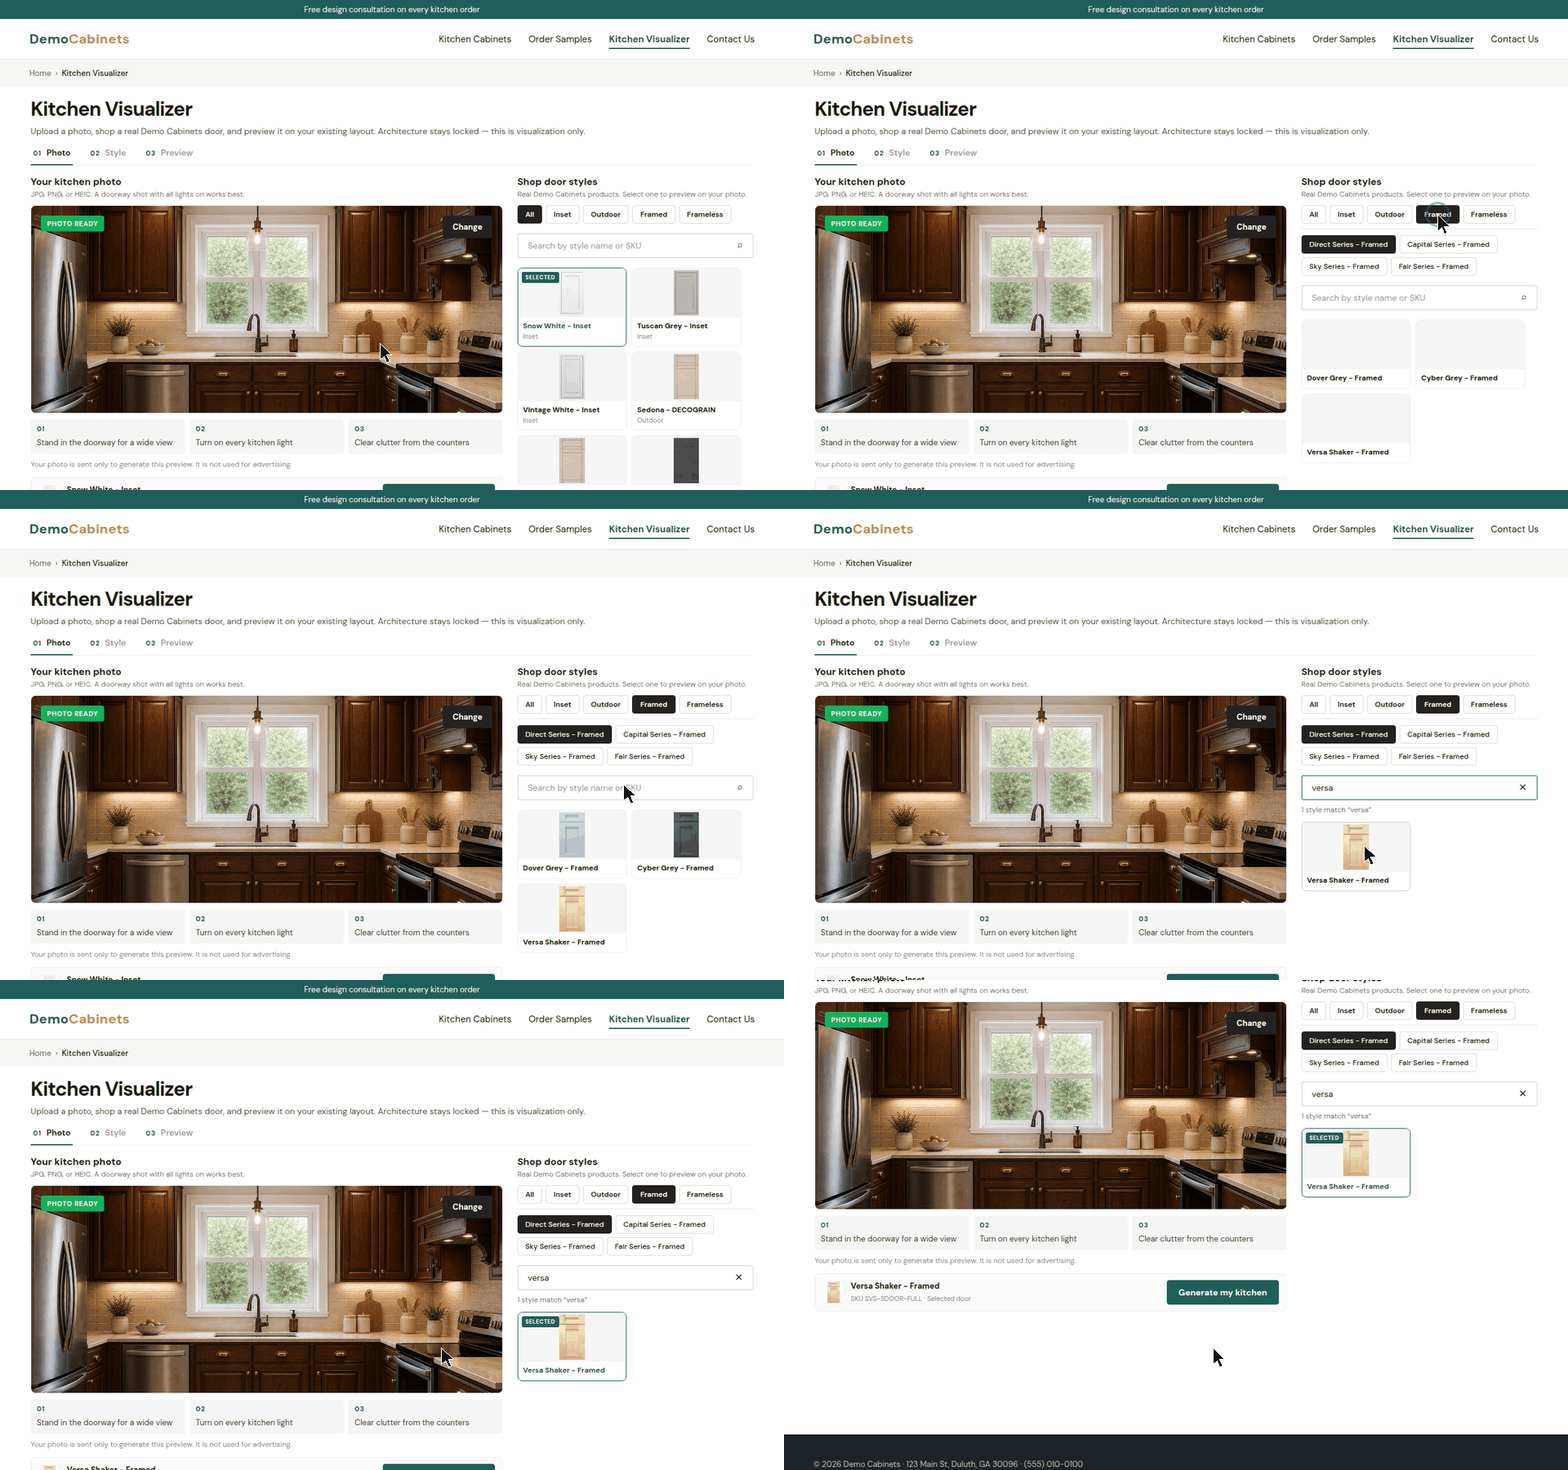
Under Shop door styles, the shopper filters by construction (Inset, Framed, Frameless and so on) and series, or searches by style name or SKU, then clicks a door to select it. The chosen door and its SKU appear next to Generate my kitchen.
Step 4: Enter contact details
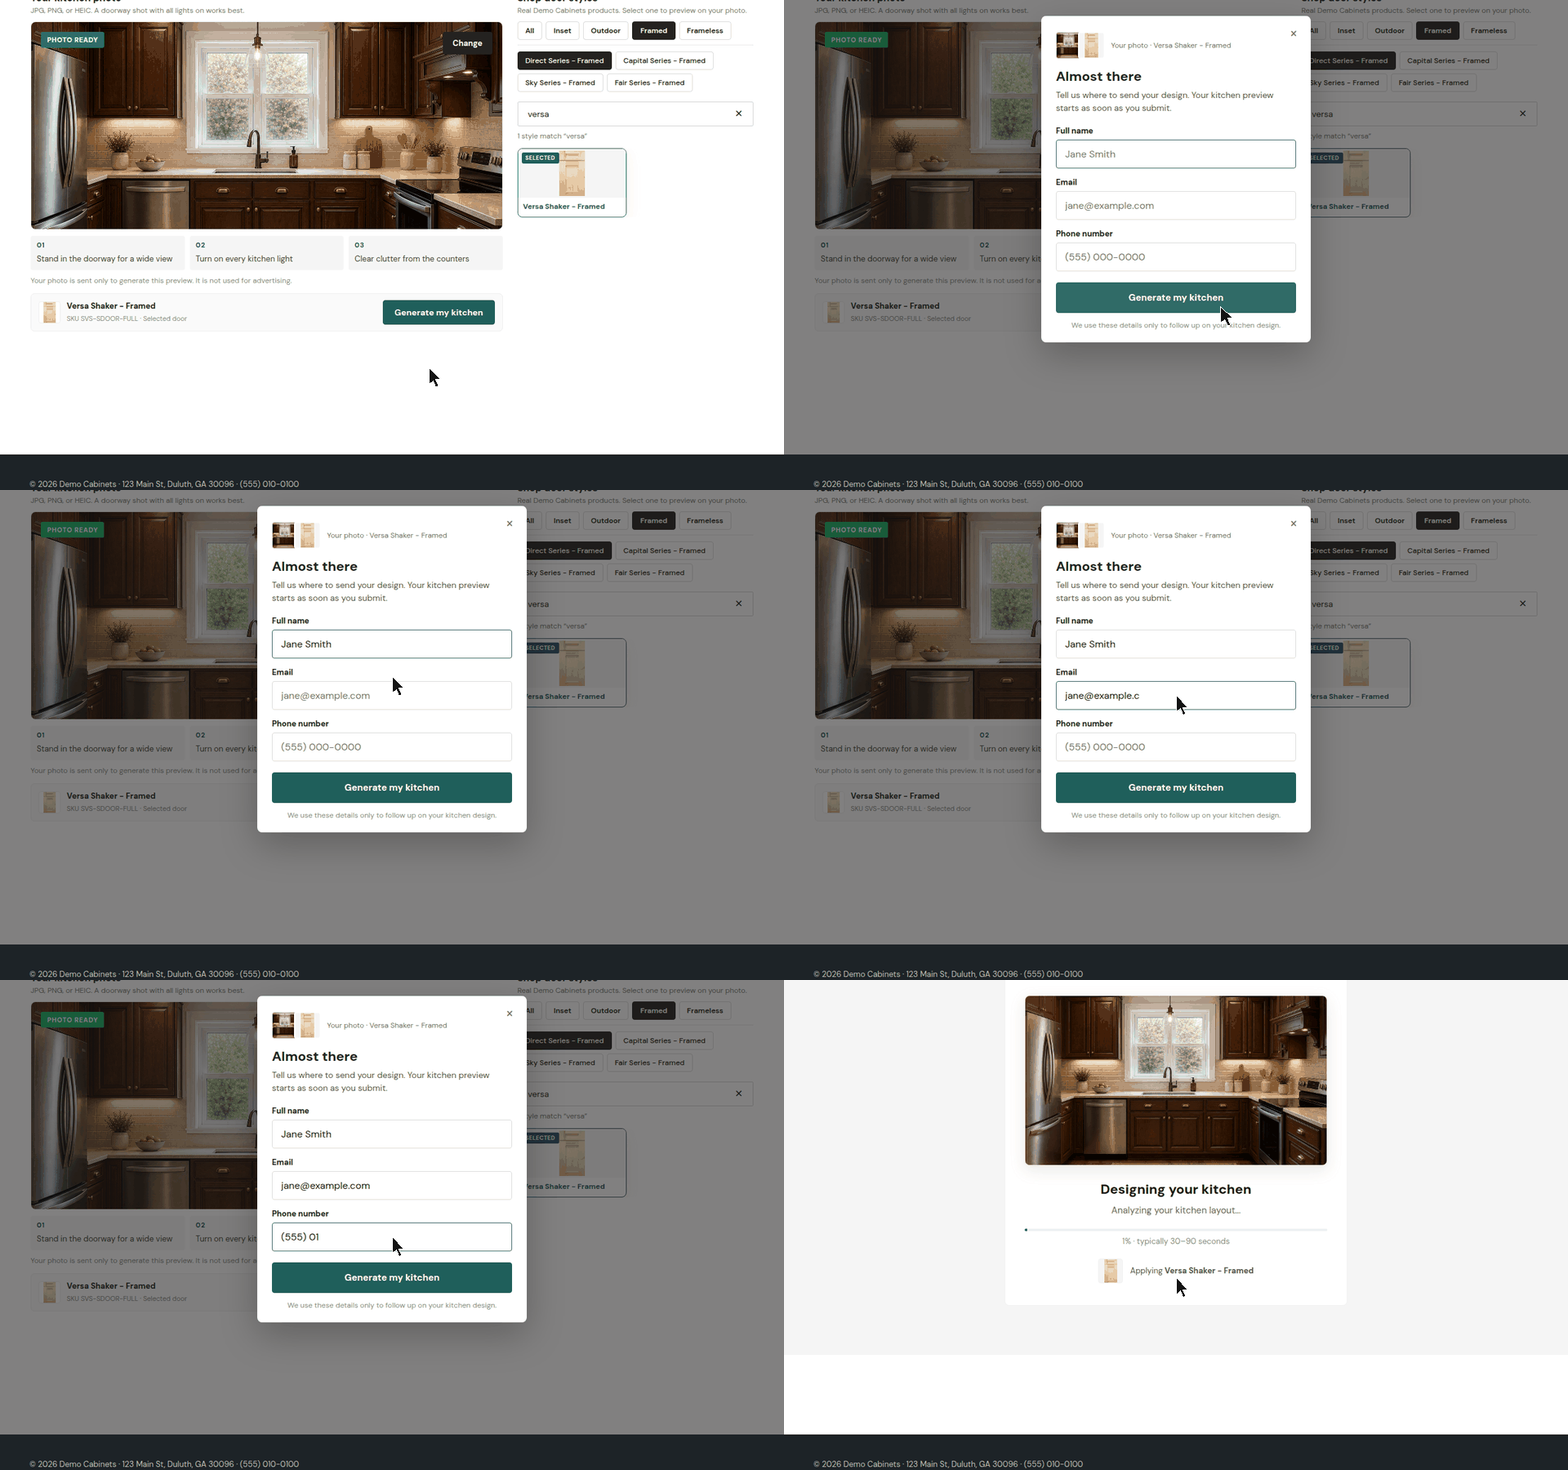
Clicking Generate my kitchen opens an Almost there pop-up. The shopper enters their full name, email and phone number and clicks Generate my kitchen again. This saves them as a lead, together with their kitchen photo. When reCAPTCHA is switched on, an "I'm not a robot" checkbox also appears here.
Step 5: The design is generated
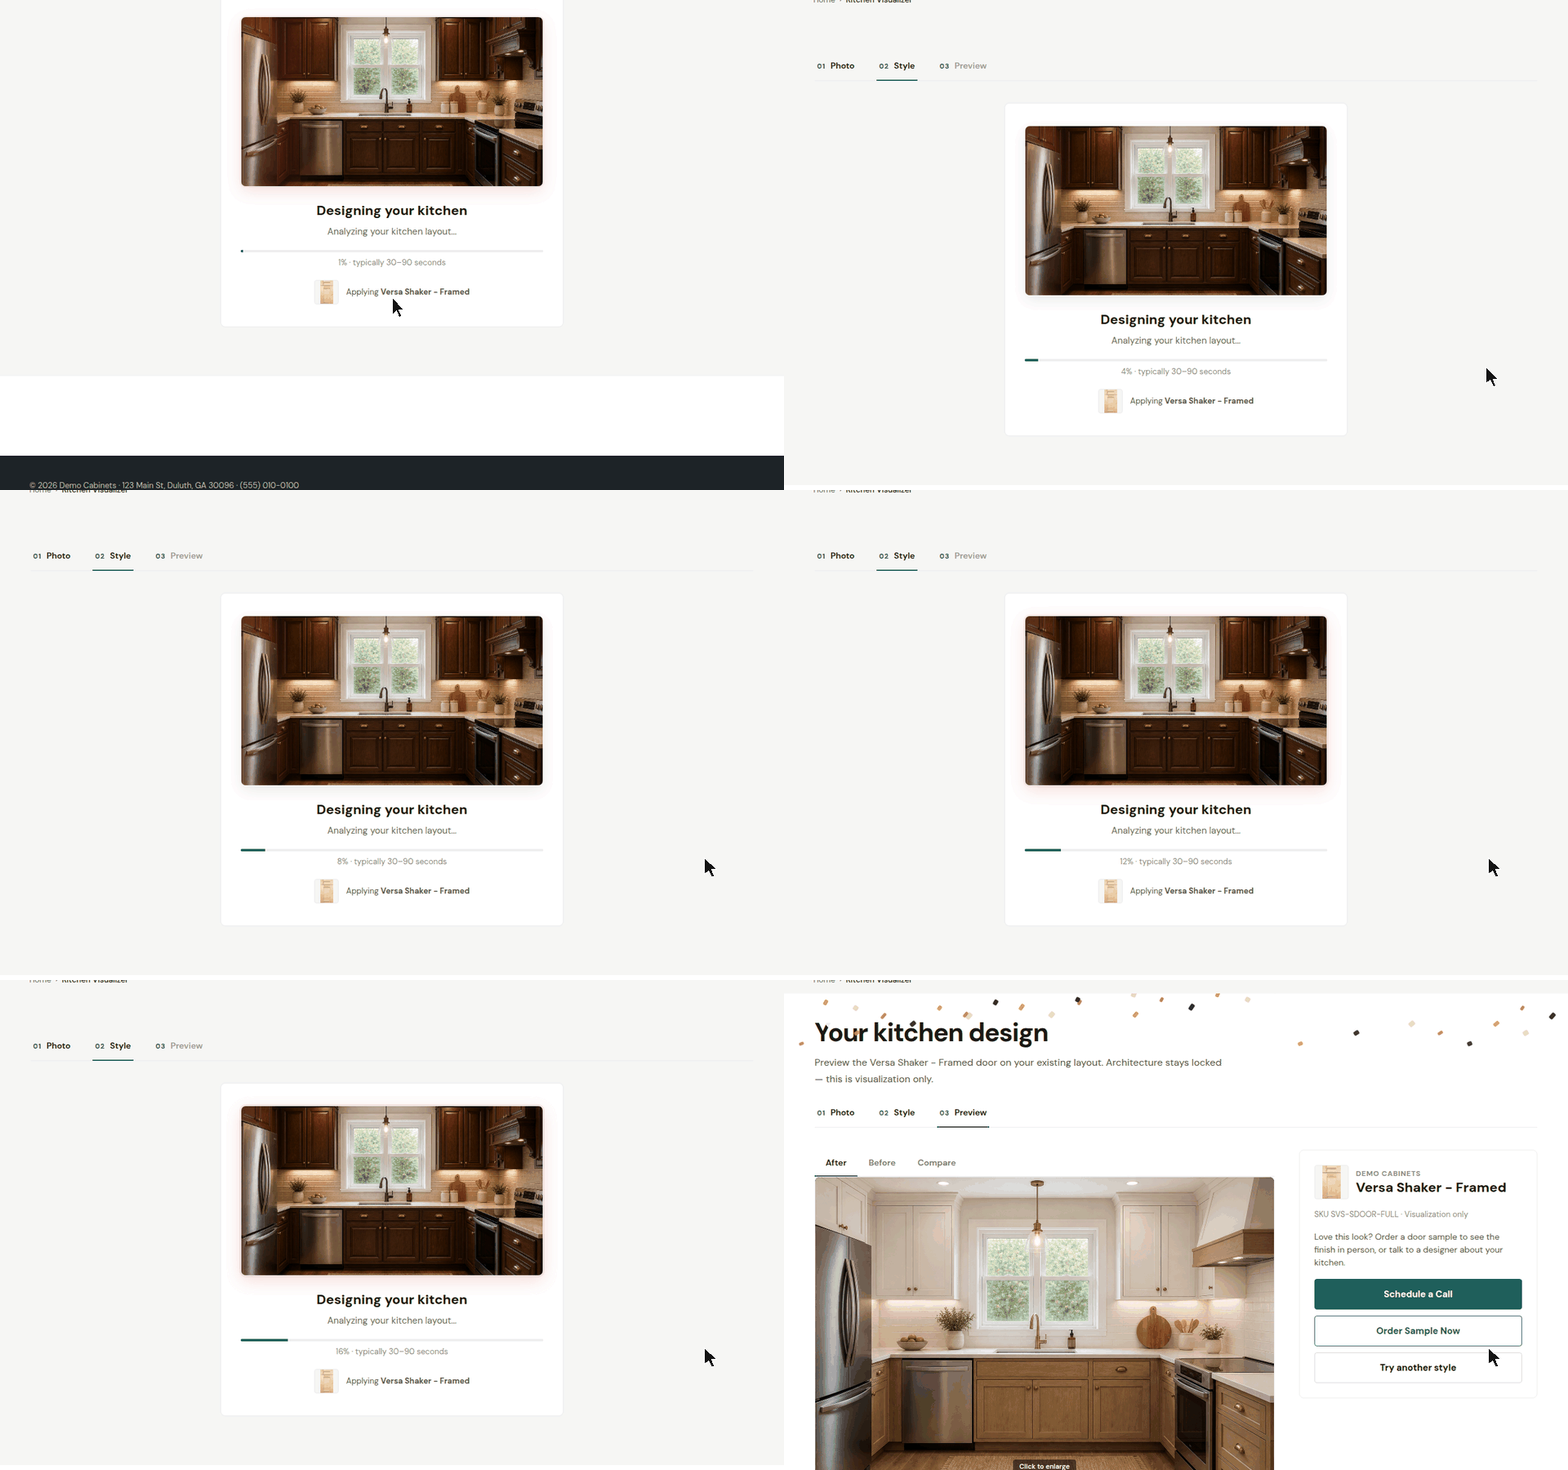
The tool shows Designing your kitchen with a progress bar, status messages and the door being applied. This usually takes 30–90 seconds. Only the cabinet doors and hardware change. Walls, windows, appliances and the layout stay the same.
Step 6: Review the design and take the next step
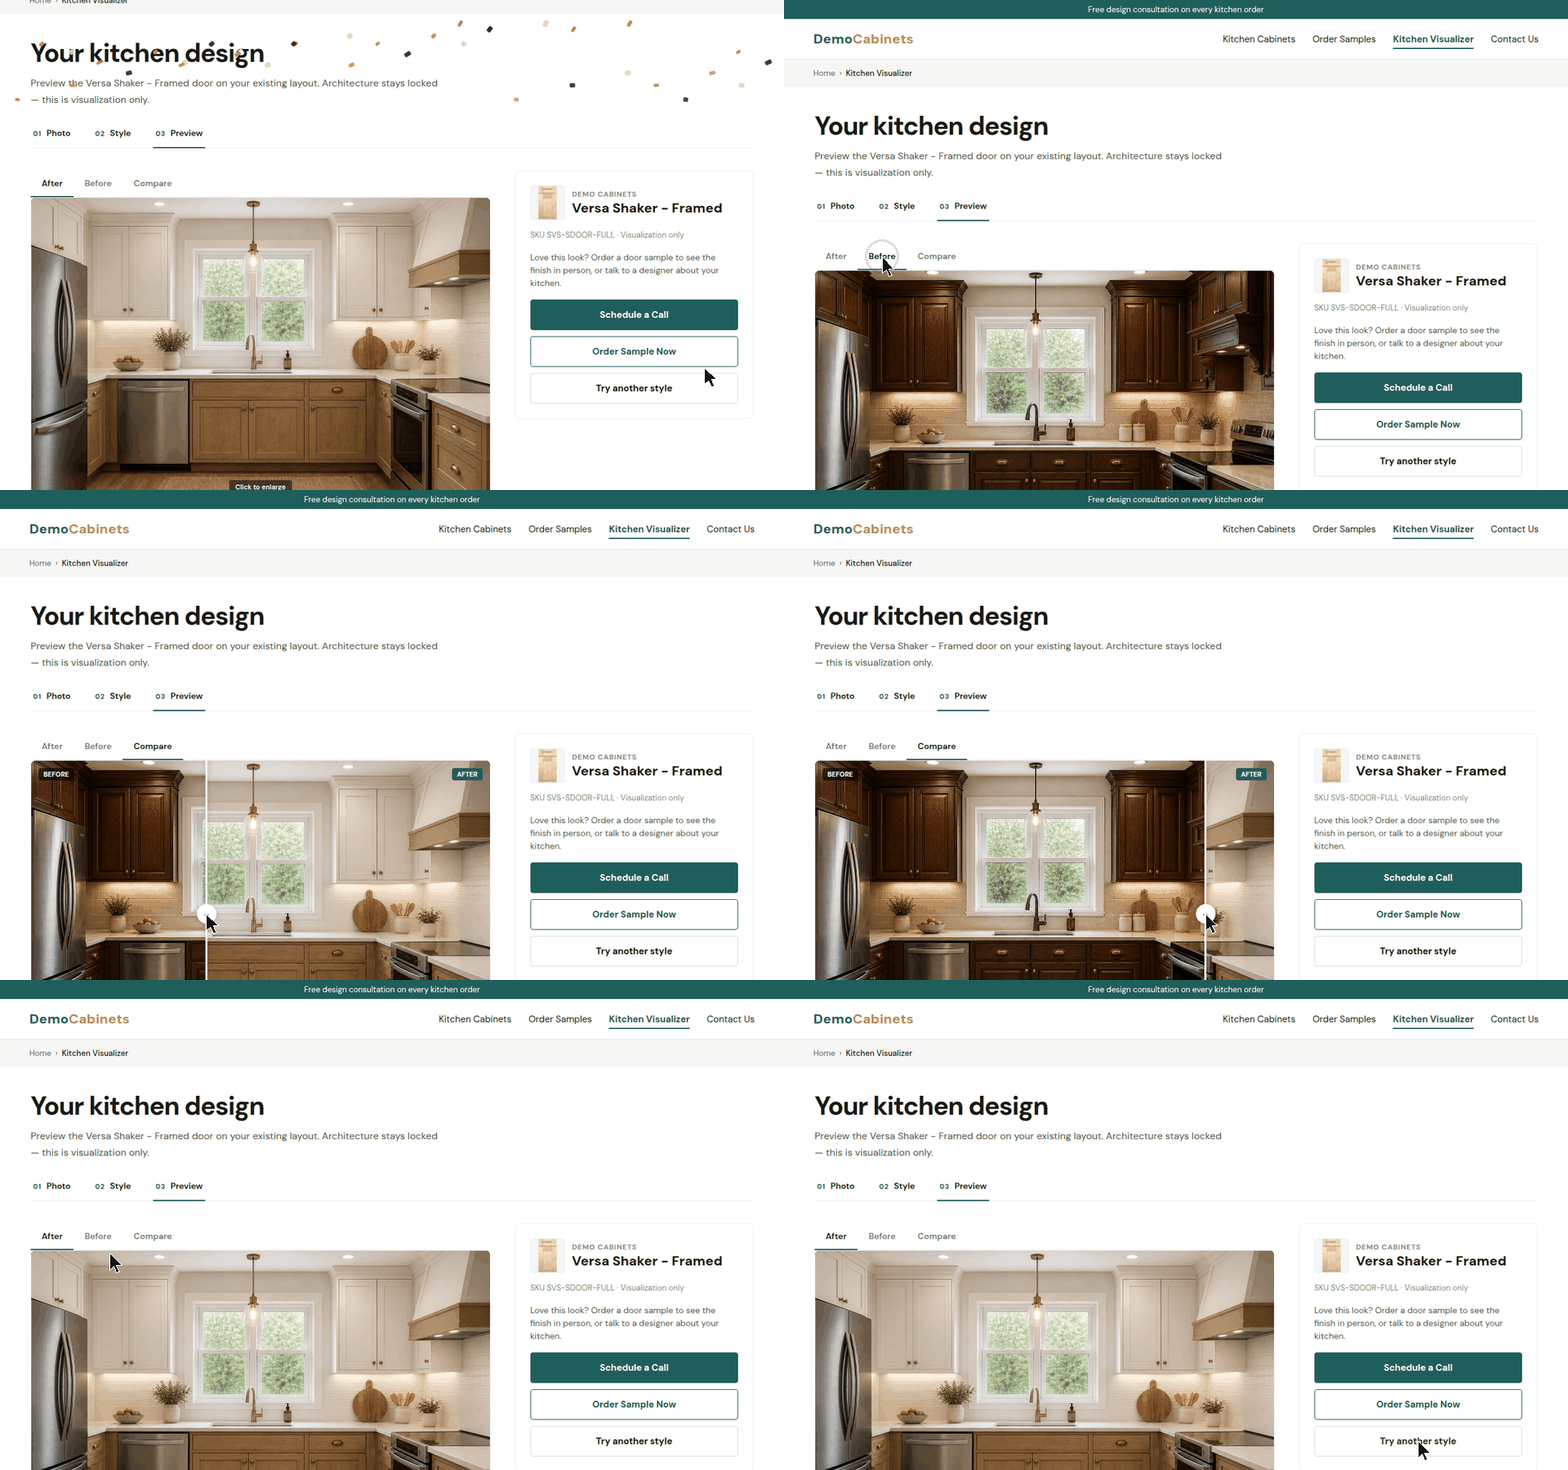
Your kitchen design shows the result, with After, Before and Compare (a slider between the two) views. Clicking the image opens it full screen. The design is added to the shopper's lead and emailed to them. From here the shopper can Schedule a Call, Order Sample Now, or Try another style.