Quote Management
You can access this by navigating to:
Dashboard > Sales > Quote Management
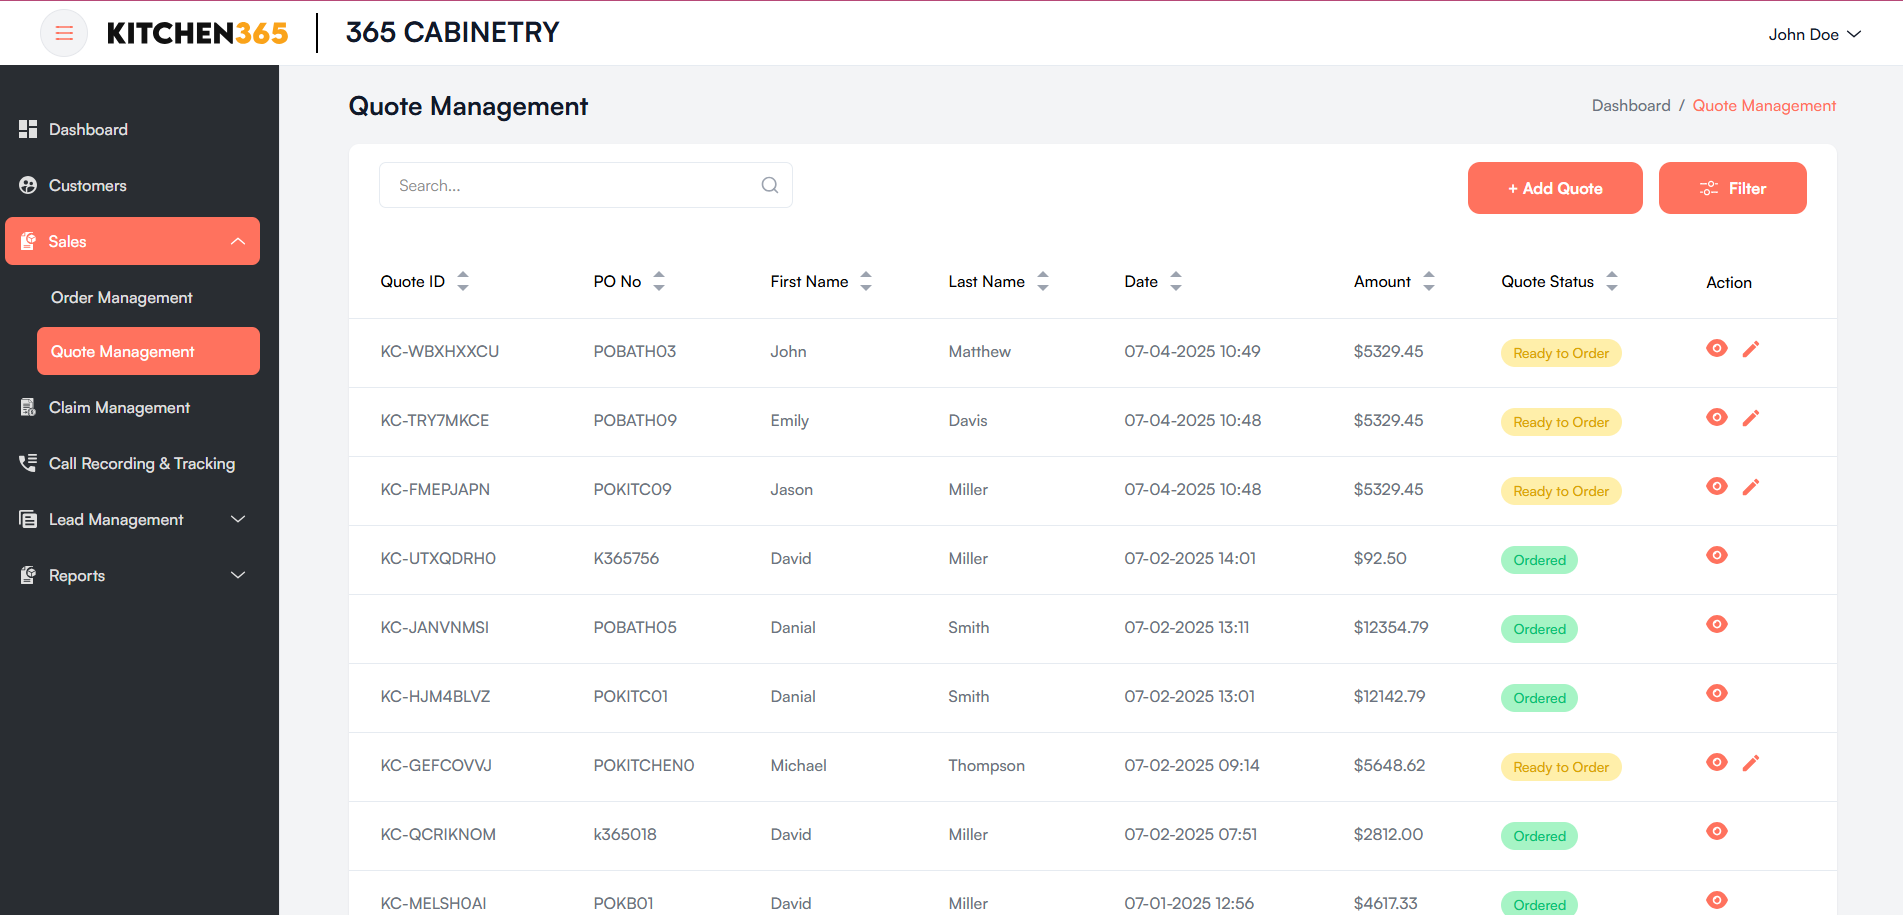
This section allows you to manage customer quotes including creation, tracking, and status updates.
a. Quote List
The main listing table includes the following columns:
| Column | Description |
|---|---|
| Quote ID | Unique identifier for each quote. |
| PO No. | Purchase Order number linked to the quote. |
| First Name | Customer’s first name. |
| Last Name | Customer’s last name. |
| Date | Timestamp when the quote was generated. |
| Amount | Total value of the quote. |
| Quote Status | Indicates status (Ordered, Ready to Order). |
| Action | Icons to view 👁️ or edit ✏️ the quote. |
You can search quotes using the bar above the table by Quote ID, PO No., or customer names.
i. Quote Status
- Ordered (Green): The quote has been confirmed and converted into an order.
- Ready to Order (Yellow): The quote is ready for submission but not yet confirmed.
ii. Actions
Under the "Action" column, you'll find:
- 👁️ View Quote: Click to open and see the full details of a quote.
- ✏️ Edit Quote: Click to edit quote information (available only before it is marked as Ordered).
iii. Add a New Quote
To create a new quote:
- Click the "+ Add Quote" button on the top right.
- Fill in the required details in the redirected form.
- Click Save Quote or Save Quote & Send Email to generate a new quote.
b. Edit Quote
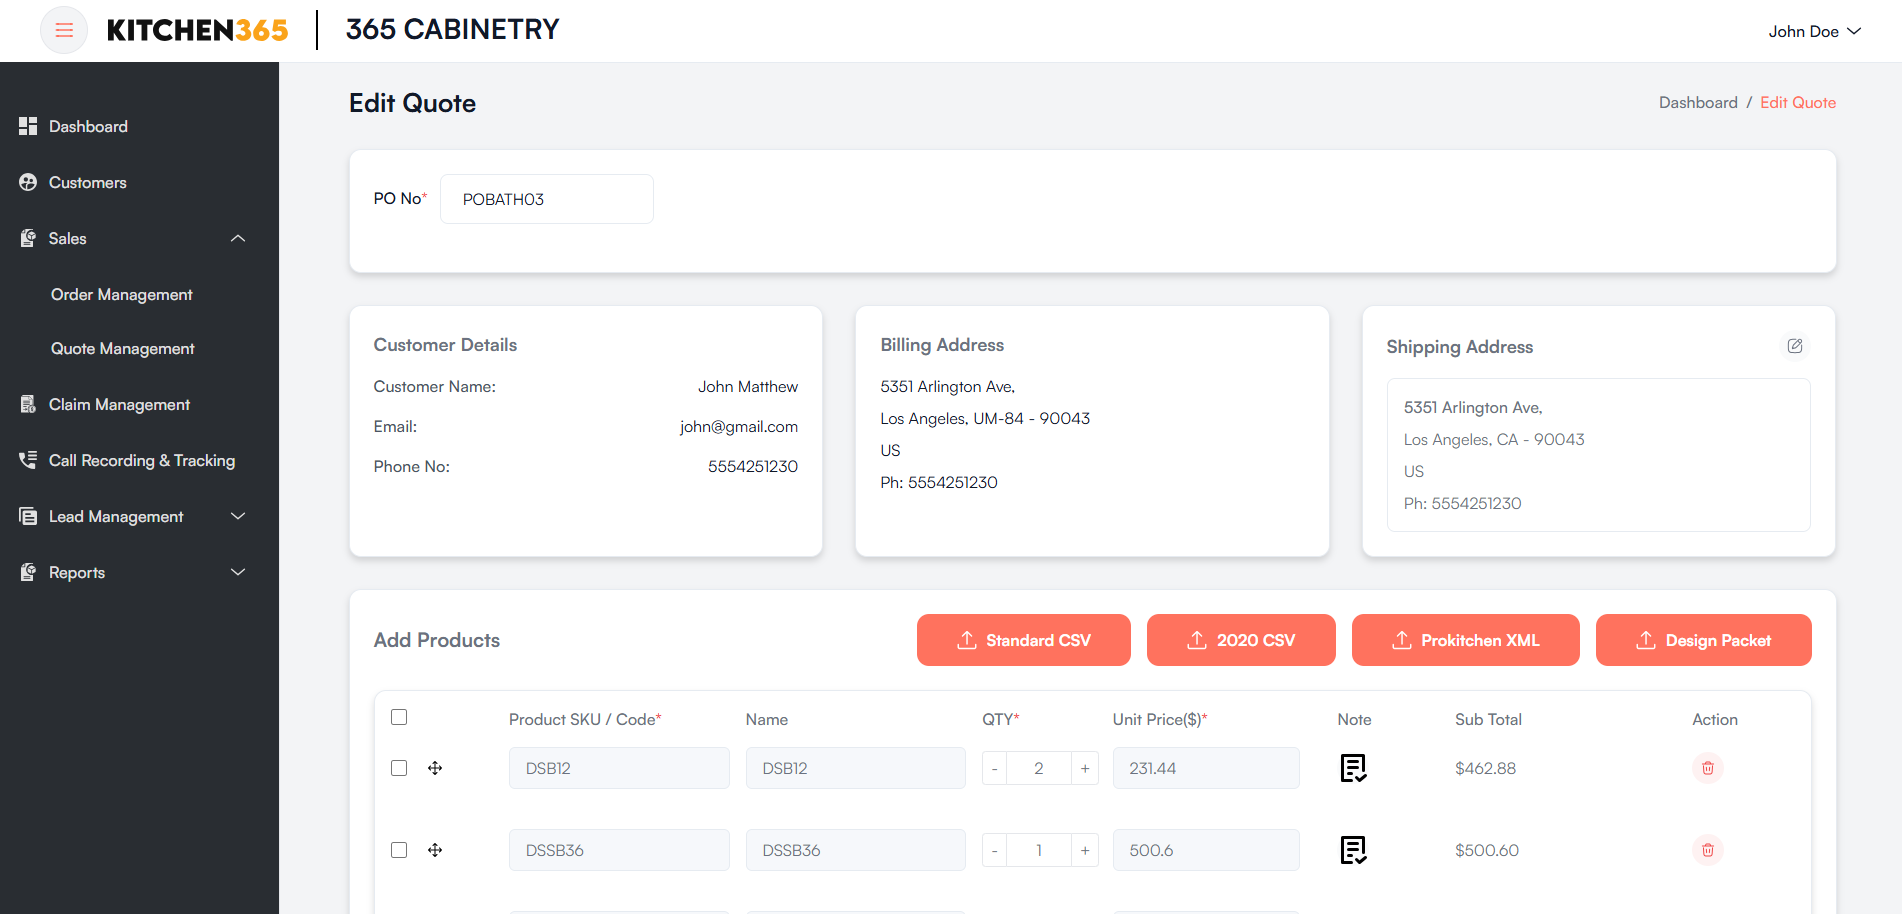
The Edit Quote page allows users to update an existing quote, modify customer details, add or remove products, apply shipping charges, taxes, and discounts, and finalize the quote or proceed with order placement.
Navigation
- Navigate to Sales > Quote Management from the left panel.
- Locate and select the desired quote using the “Edit” icon.
- The edit icon is visible in the quote listing page under the respective entry, but it will only appear if the order status is 'Ready to Order'.
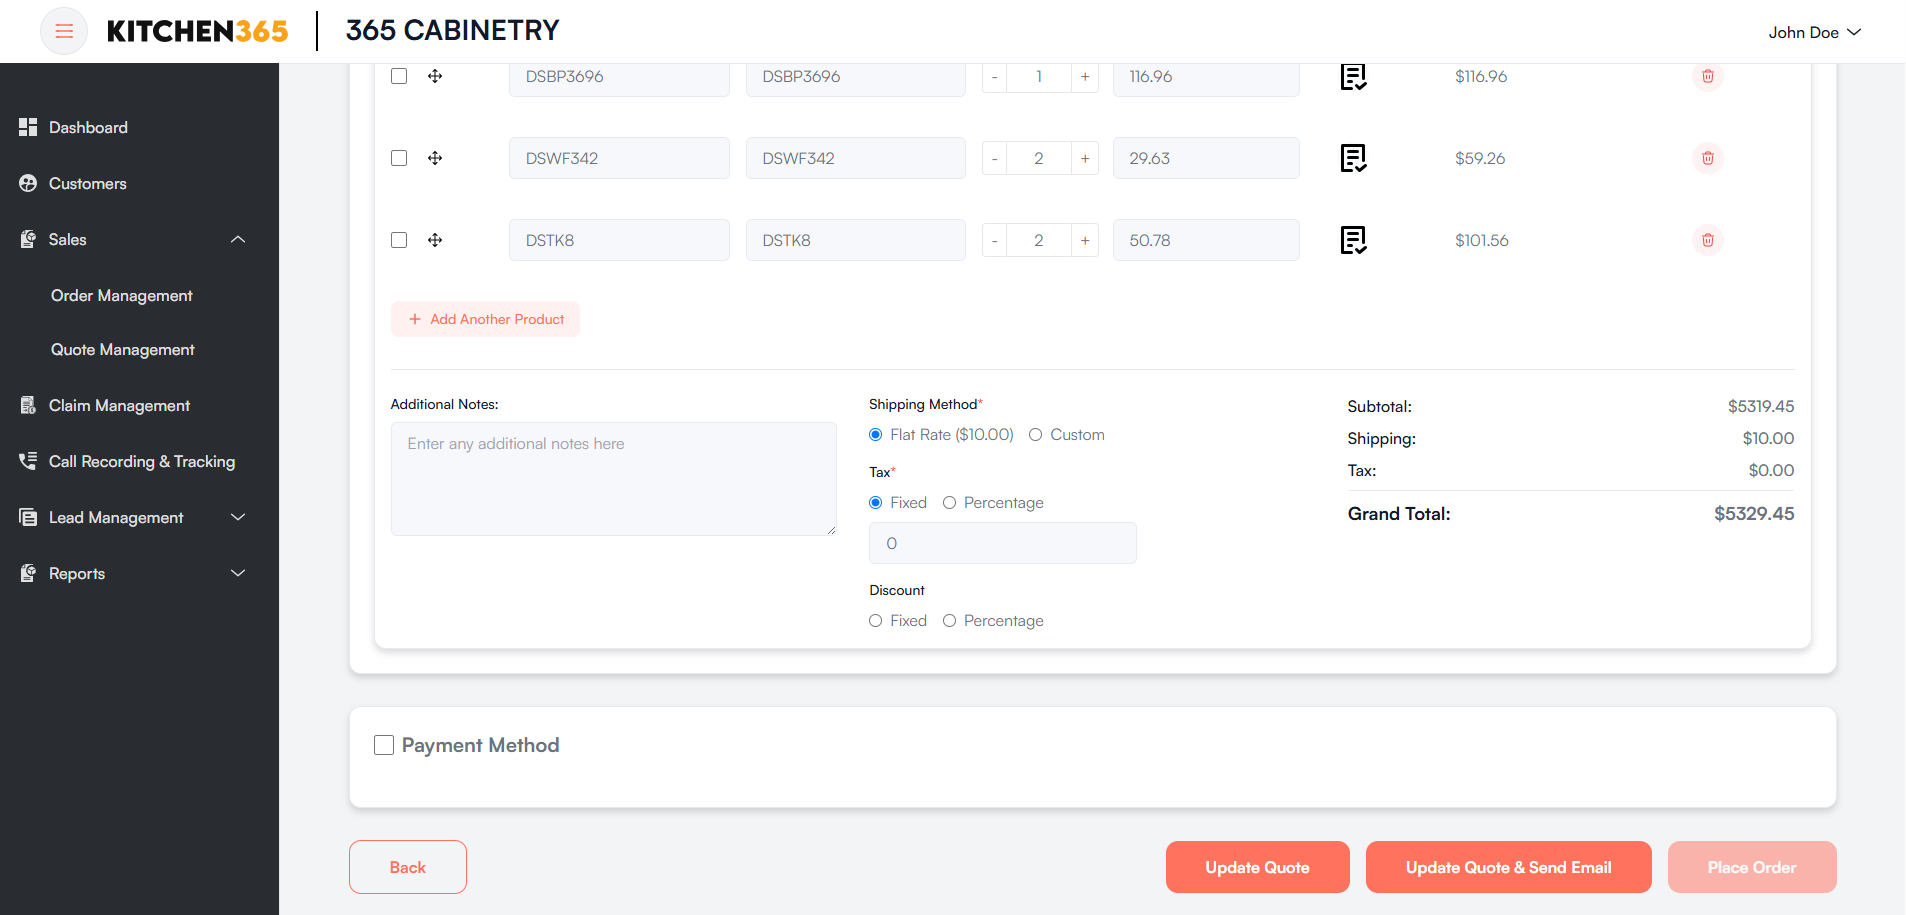
The form here is the same as shown in the quote creation. You can update the quote by clicking the 'Update Quote' button, or update and send the revised quote via email to the customer.
Additionally, you can place an order from the Edit Quote screen by clicking on the 'Place Order' button after selecting the payment method.
c. View Quote Details
- Click on 👁️ View Quote under the Action column to open and see the full details of a quote.
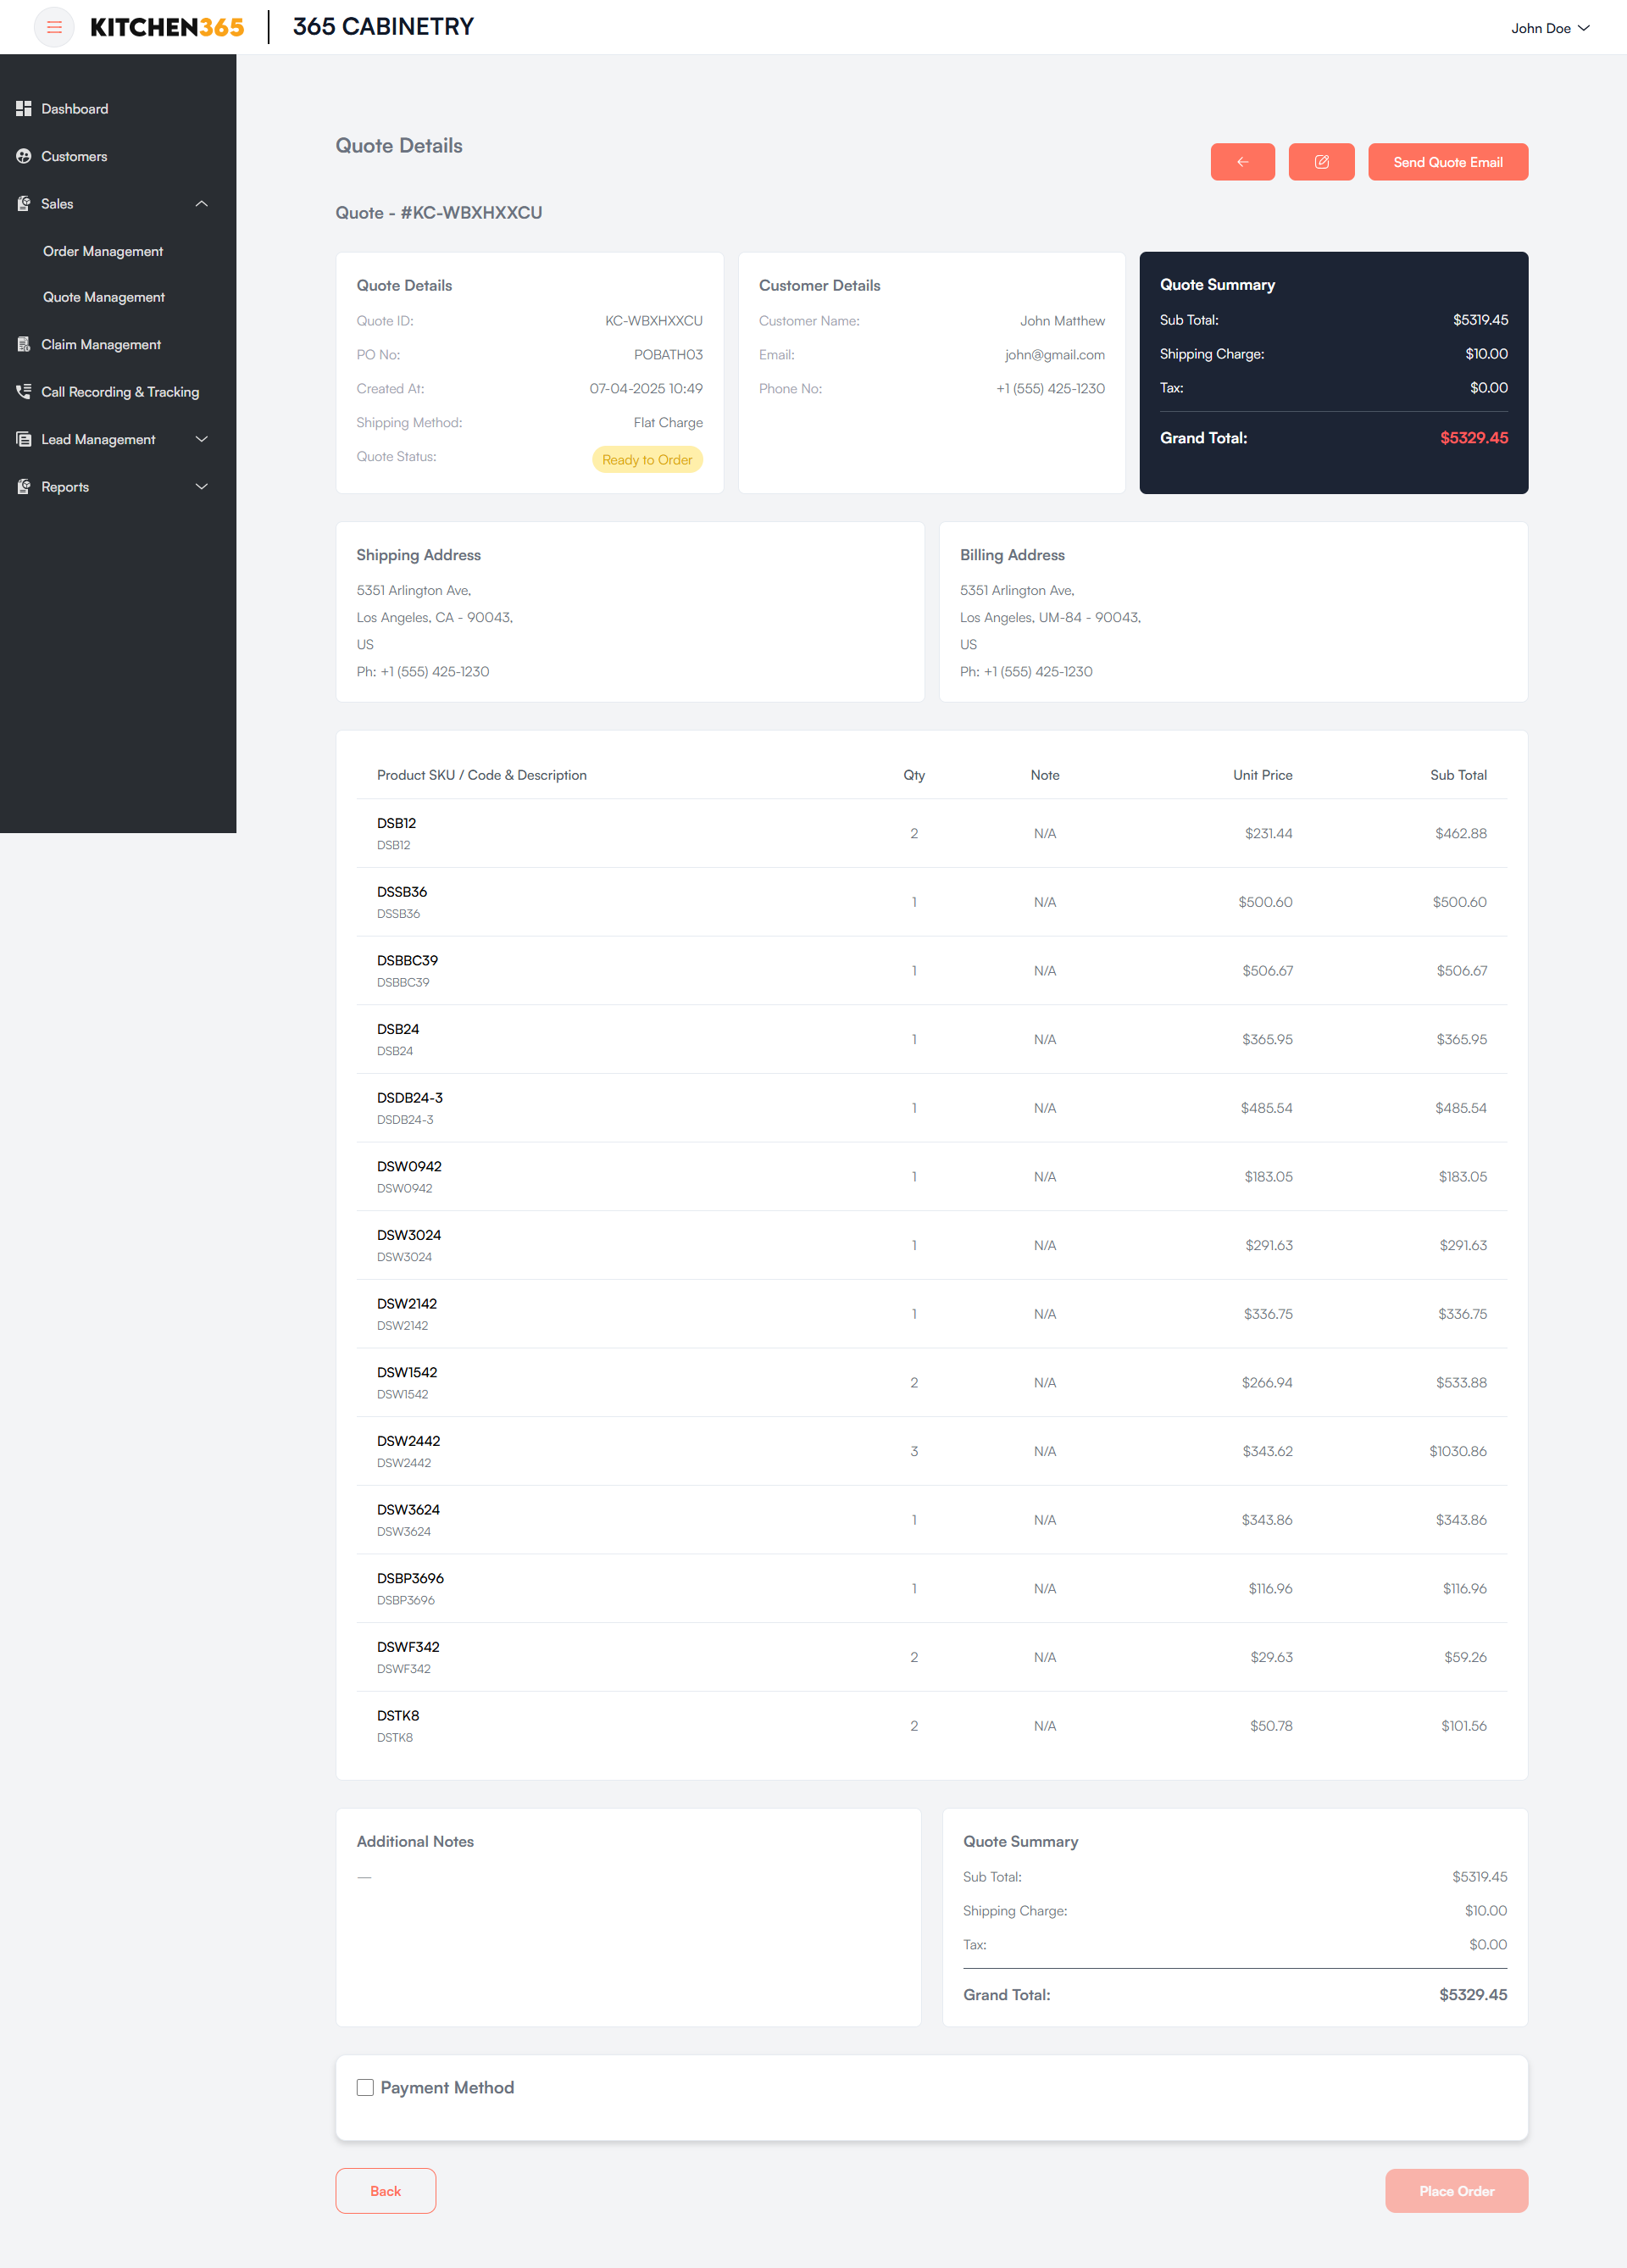
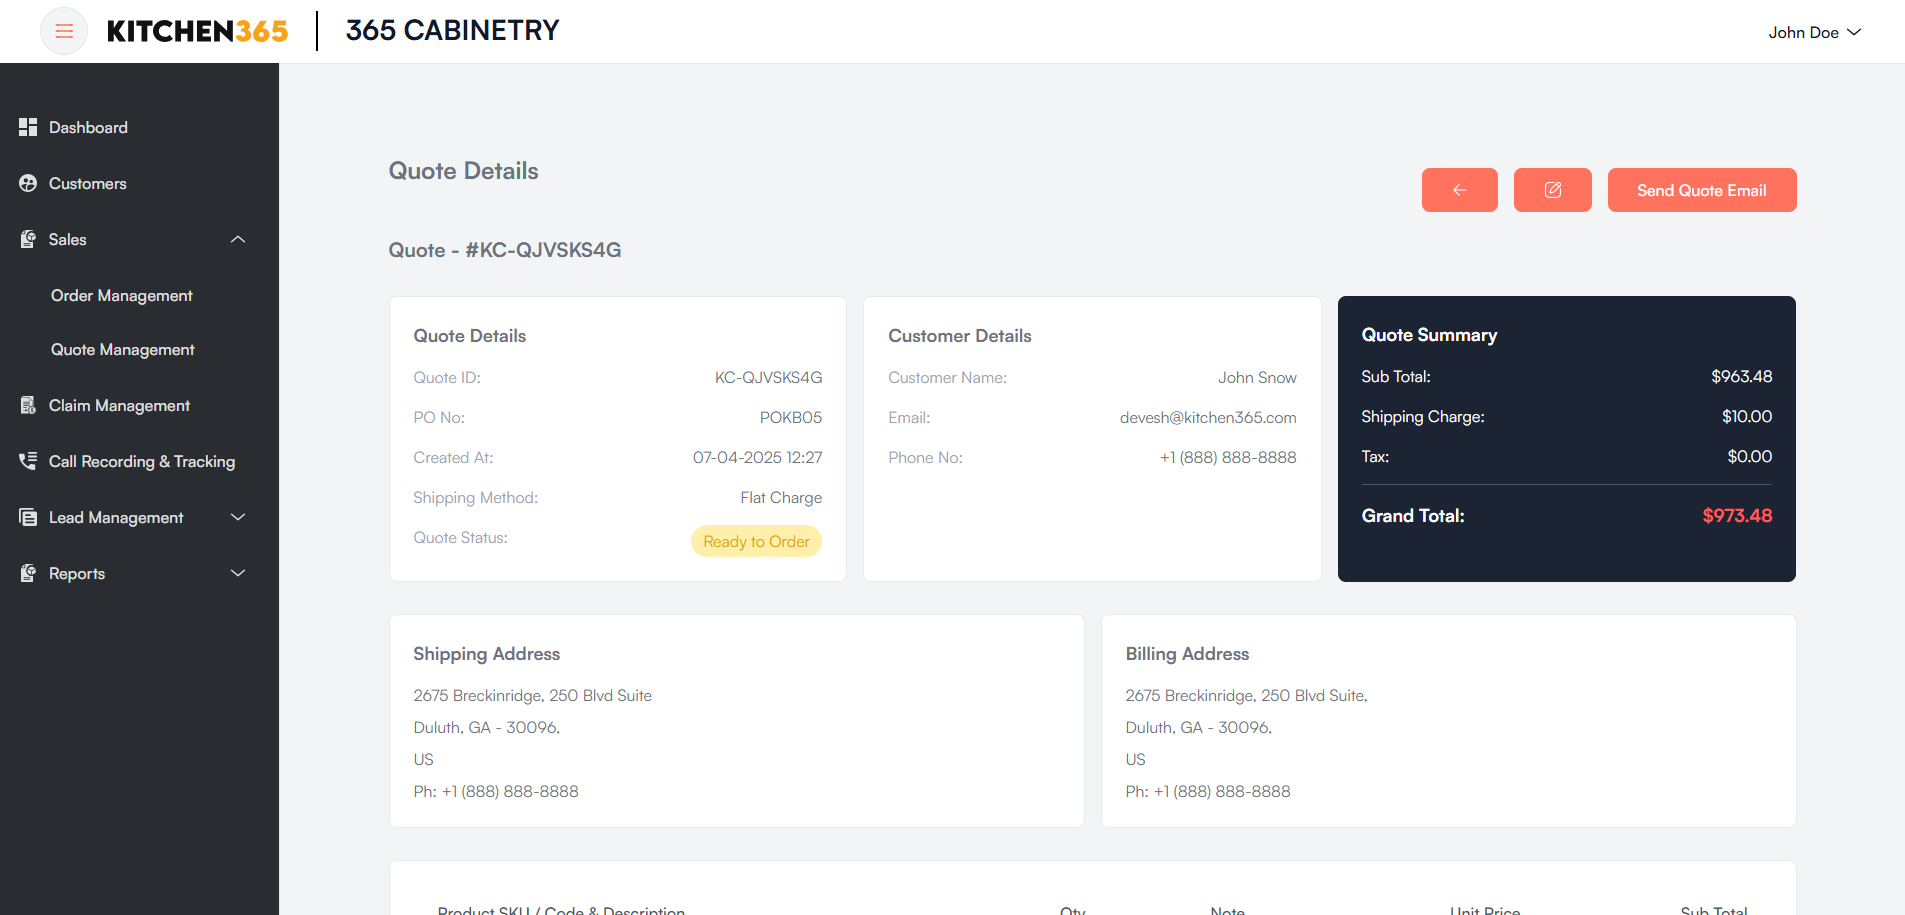
This page provides a detailed view of a quote created within the system. It includes all relevant information such as customer details, shipping and billing addresses, itemized products, pricing summary, and the final step to place the order.
Actions & Buttons
- Send Quote Email: Sends the quote via email to the customer.
- Back: Navigates to the previous screen.
- Place Order: Button (disabled until payment method is selected) to convert the quote into an order.
- Edit: By clicking on the edit button on the top right corner you'll be able to edit quote.
- Download Design Packet: You'll be able to download design packet from top right corner.
Note: This button will only be shown if the design packet is uploaded while creating or updating the quote.
d. Create New Quote
i. Overview
The Create New Quote screen in the platform allows admin, sales, or customer service representatives to generate detailed product quotes for customers. This feature streamlines the quoting process by enabling users to:
- Enter or upload product data
- Choose or create a customer profile
- Configure taxes, shipping, and discounts
- Add custom notes
- Save the quote, email it, or convert it directly into an order
This interface supports both manual item entry and supports the import items using 2020 CSV File & Prokitchen (xml) File, making it efficient for both quick and detailed quoting needs.
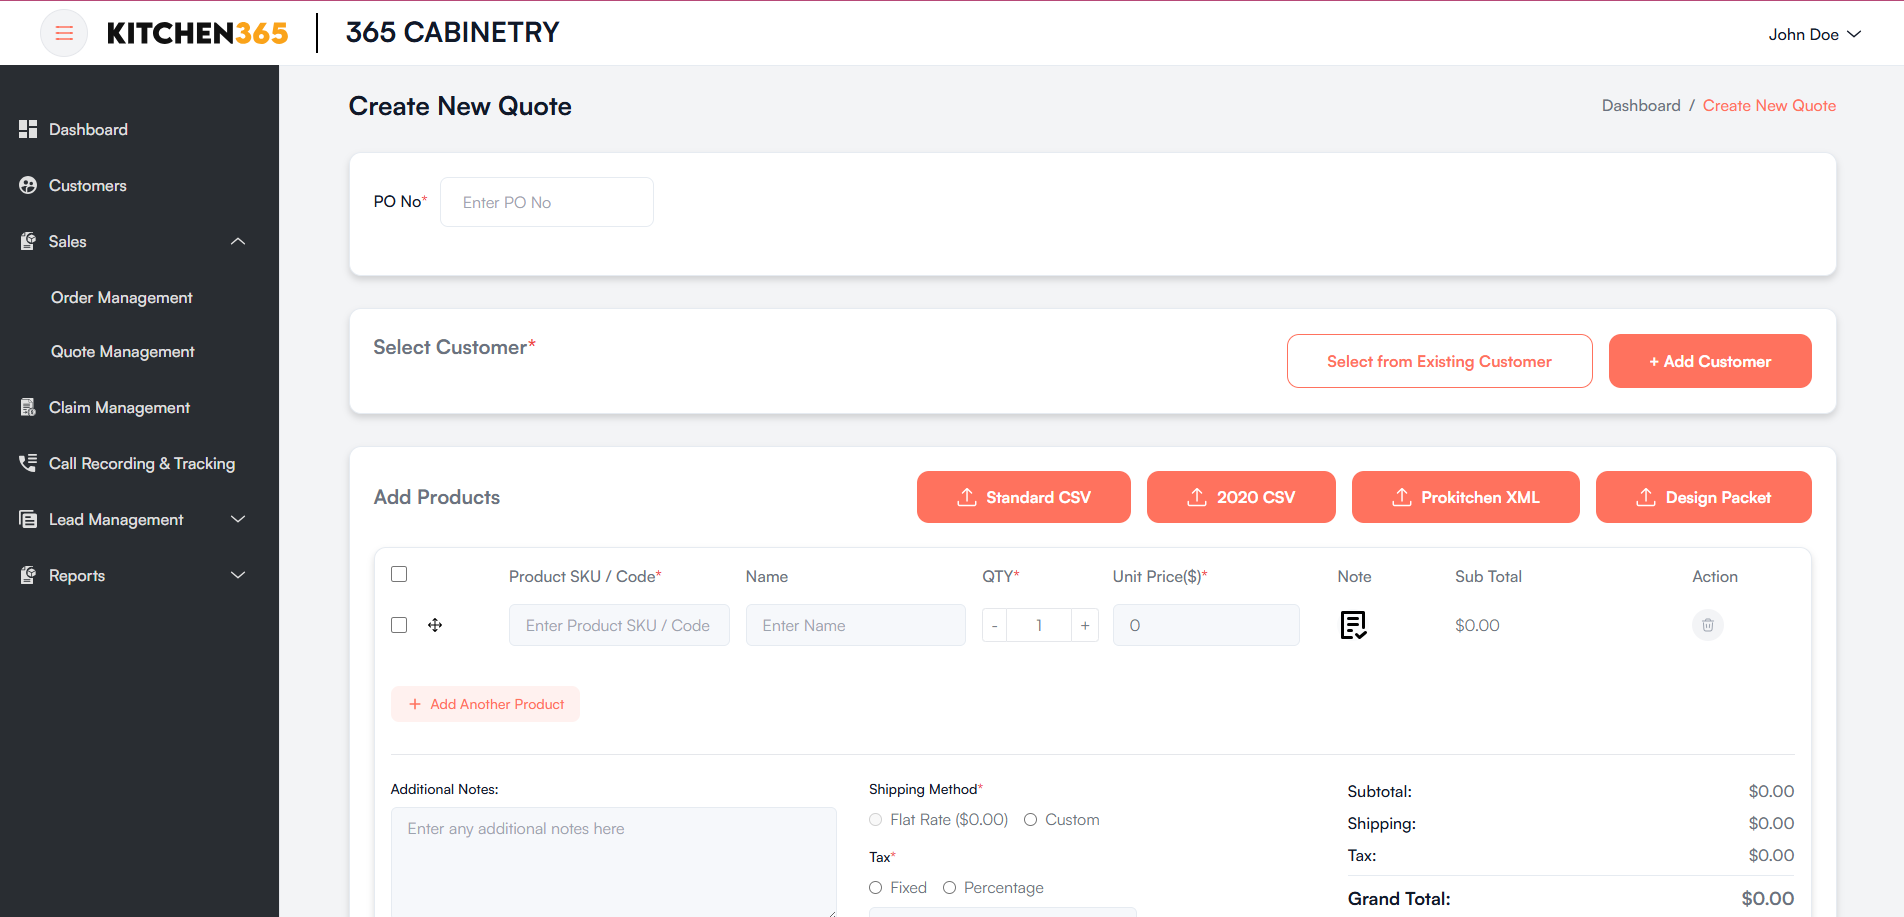
ii. All the Required Fields to Create a Quote
- PO No.: Unique purchase order number must be entered.
- Select Customer: A customer must be selected from existing records or added as new.
- Product SKU / Code: Required when adding products manually.
- Unit Price(s): Must be filled in when adding products manually.
- Shipping Method: One option must be selected.
- Tax: Either Fixed or Percentage must be selected if tax is applicable.
iii. Optional Fields
- Product Name: While optional, helps identify the product.
- Additional Notes: Notes related to the entire quote.
- Discount: Can be left empty if no discount is applicable.
- Payment Method: Not required to proceed with quote creation.
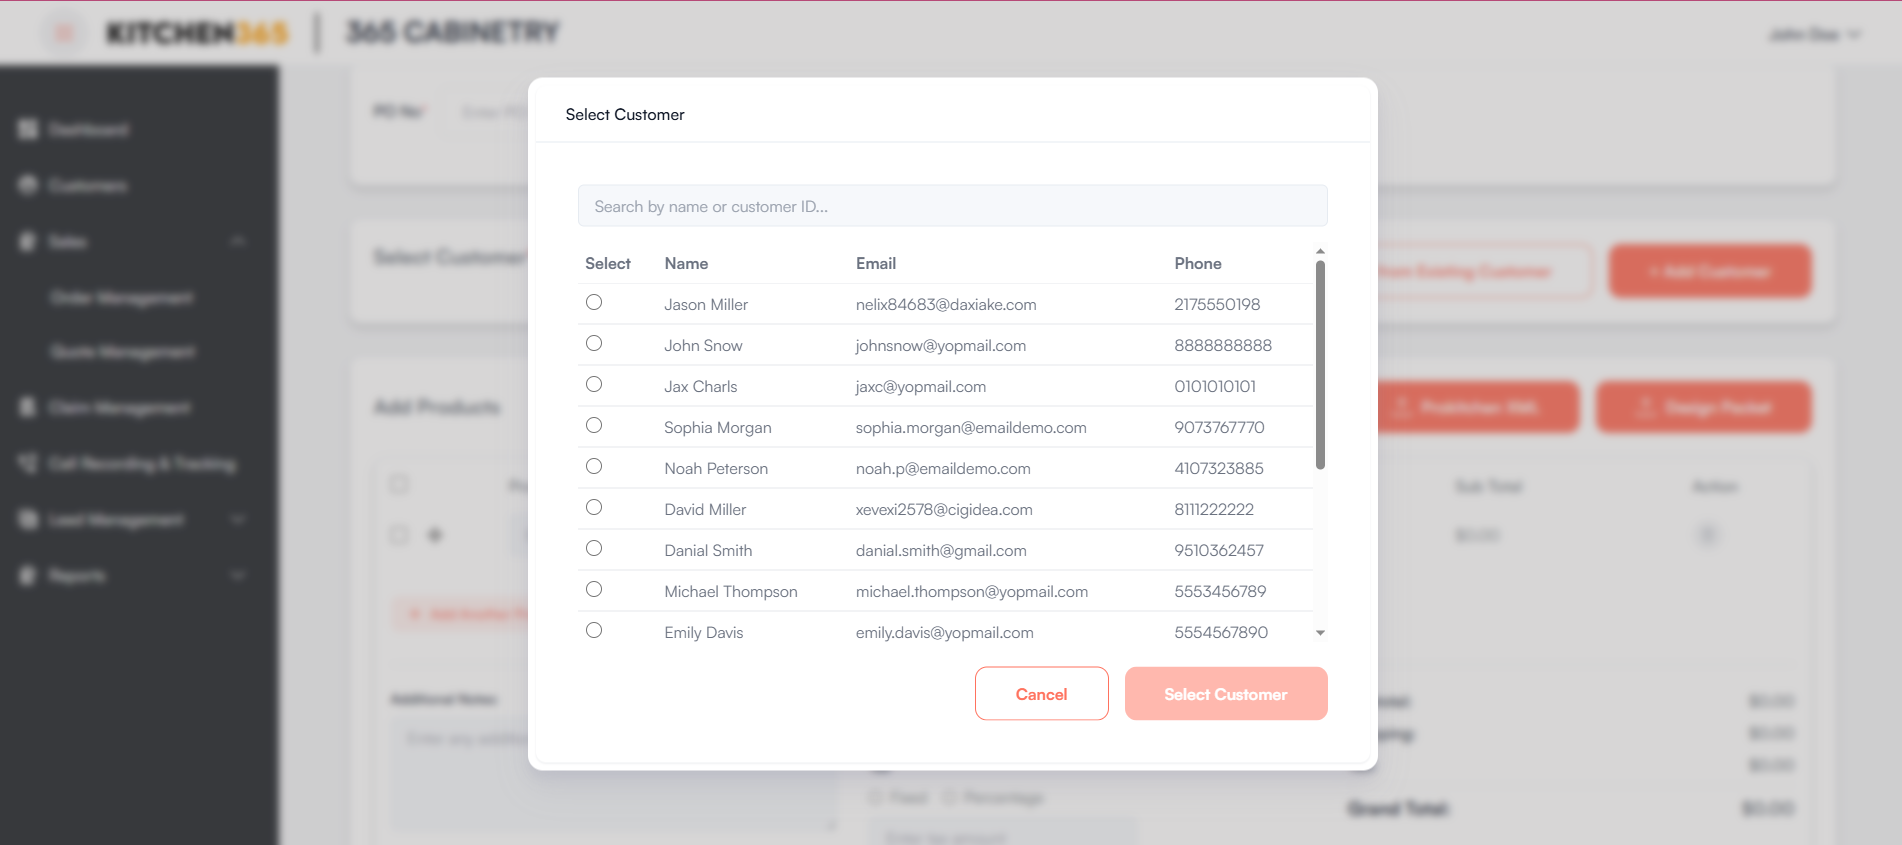
iv. Select Existing Customer or Add New Customer
You can either:
-
Click "Select from Existing Customer" to choose an existing customer.
- When "Select from Existing Customer" is clicked, a popup appears with the following features:
- Search Bar: Enables search by name or email.
- Customer List Table:
- Columns: Select, Name, Email, Phone
- Supports scrolling for large lists
- Select Customer: Activated upon selecting a customer. Fills in the customer details on the main form.
- Cancel: Closes the popup without selecting.
- When "Select from Existing Customer" is clicked, a popup appears with the following features:
-
Or click "+ Add Customer" to create a new customer. (More info in next section)
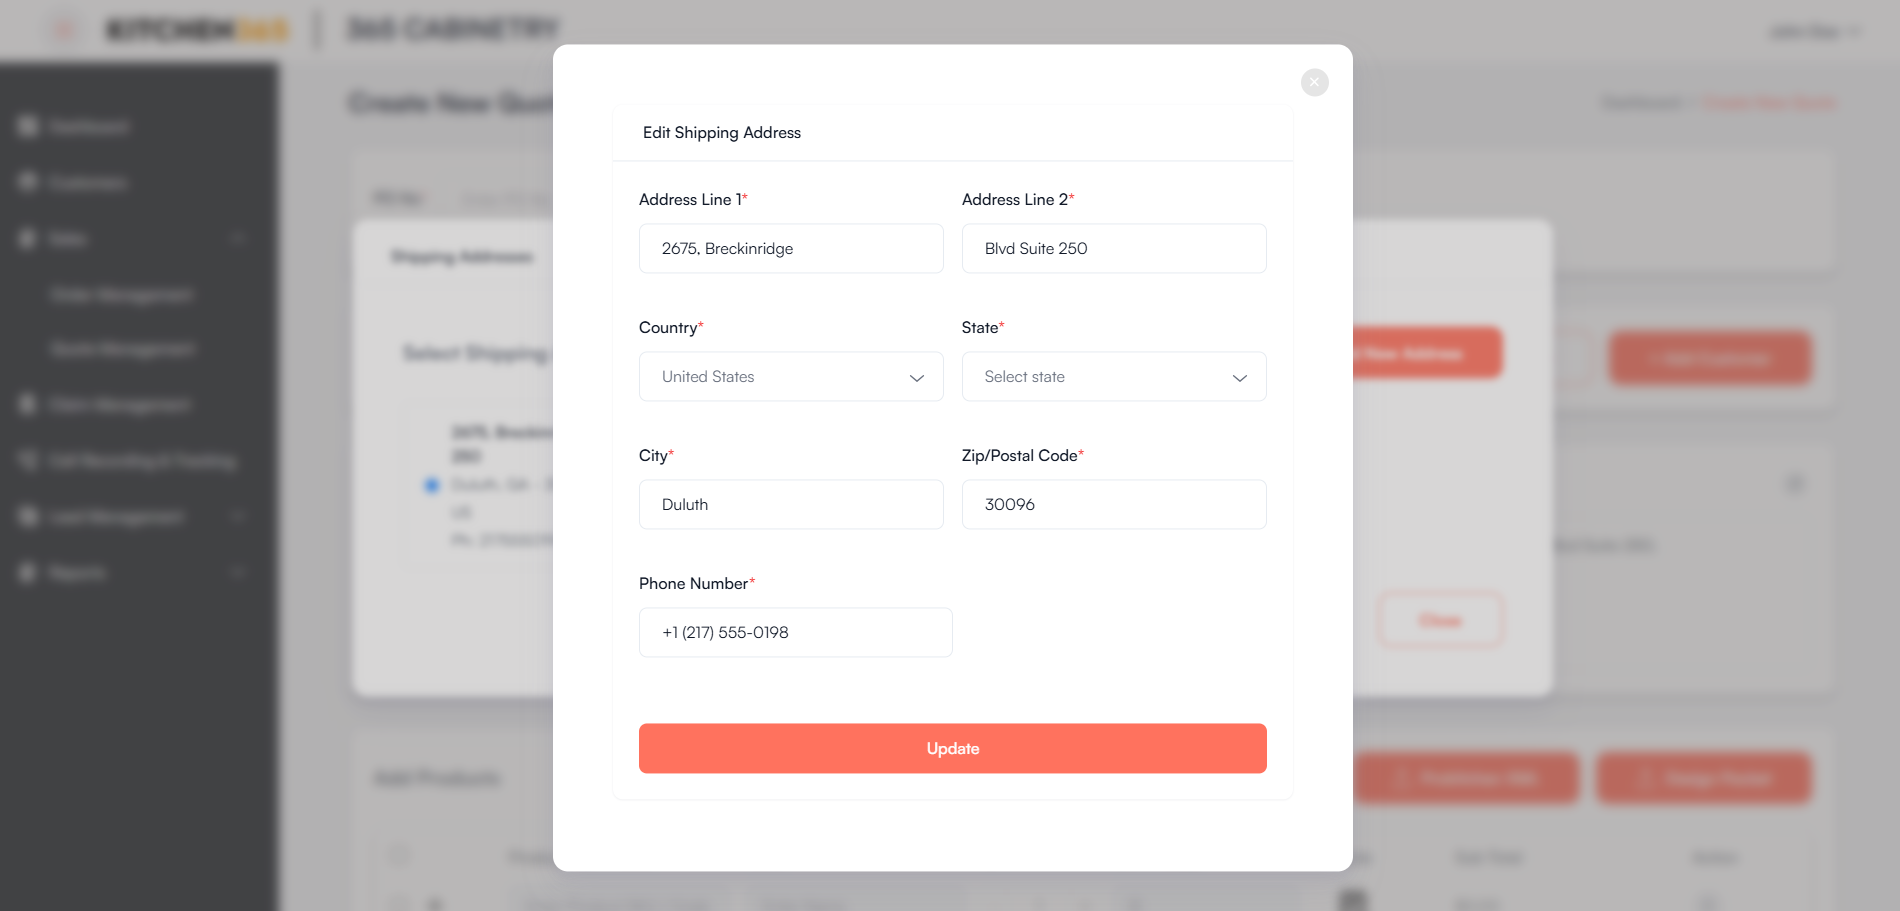
v. Change Shipping Address or Add a New Shipping Address
Once a customer is selected, you may select from their existing shipping addresses.
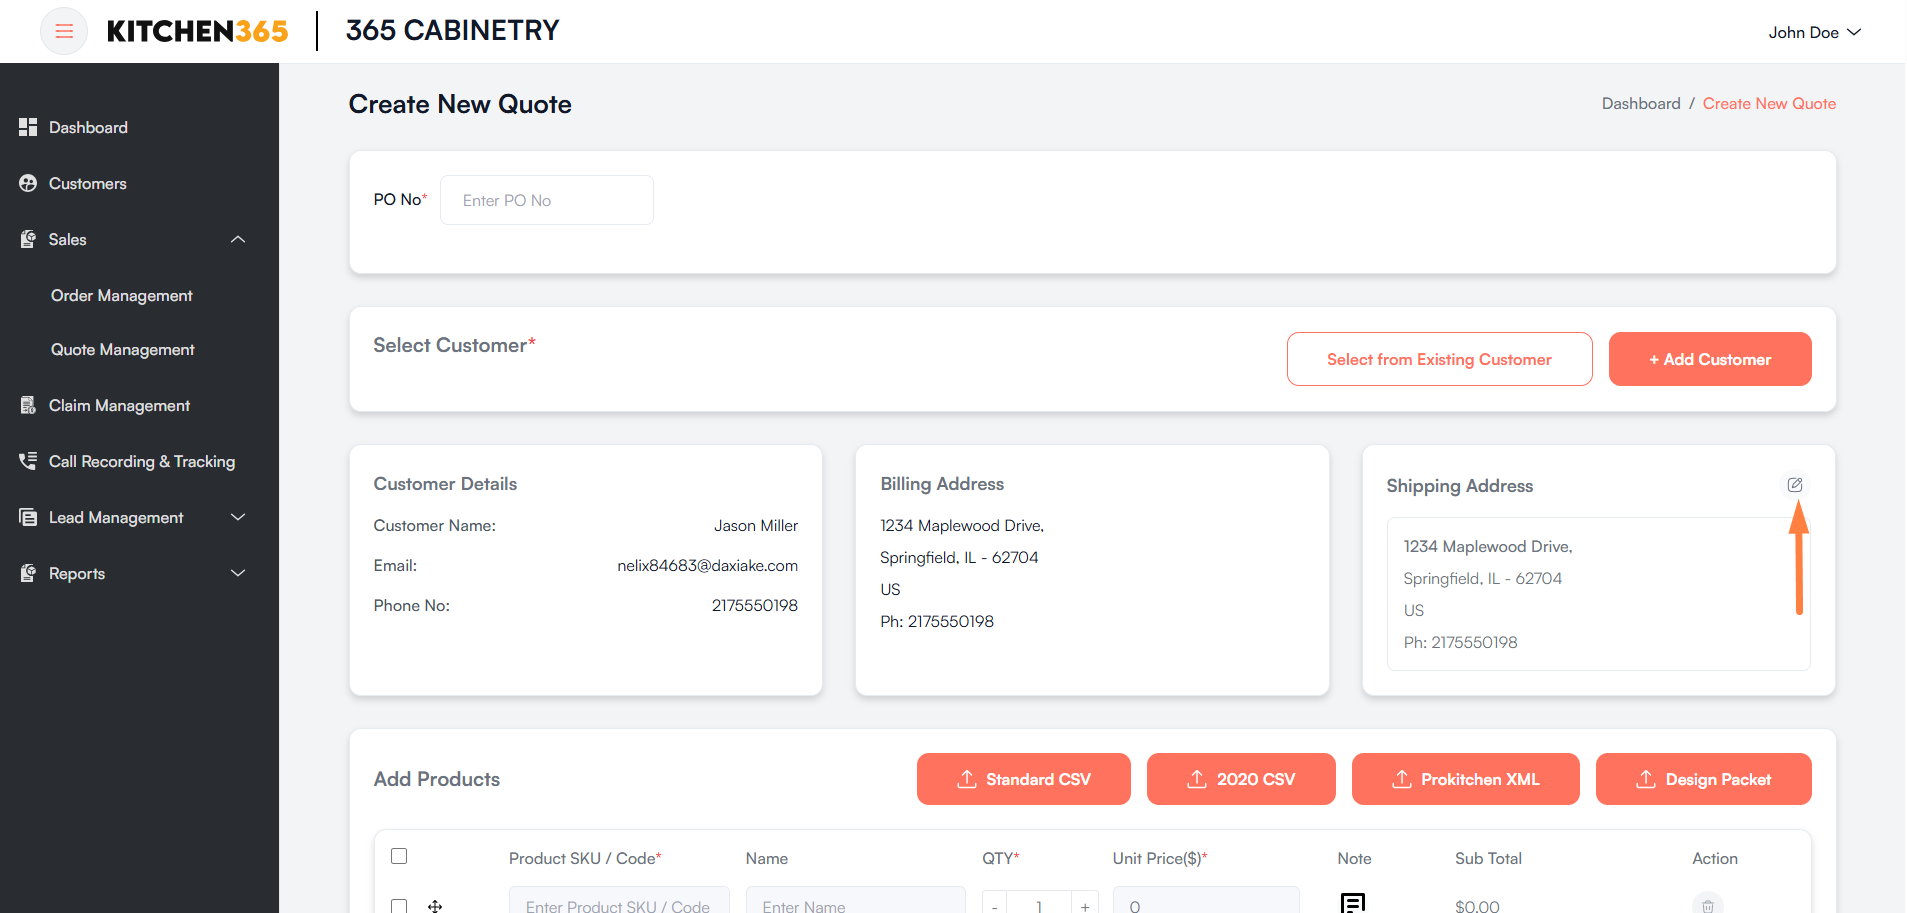
From the above screenshot, you can see the edit icon in the Shipping Address section.
By clicking on it, a pop-up appears. Please refer to the screenshot below.
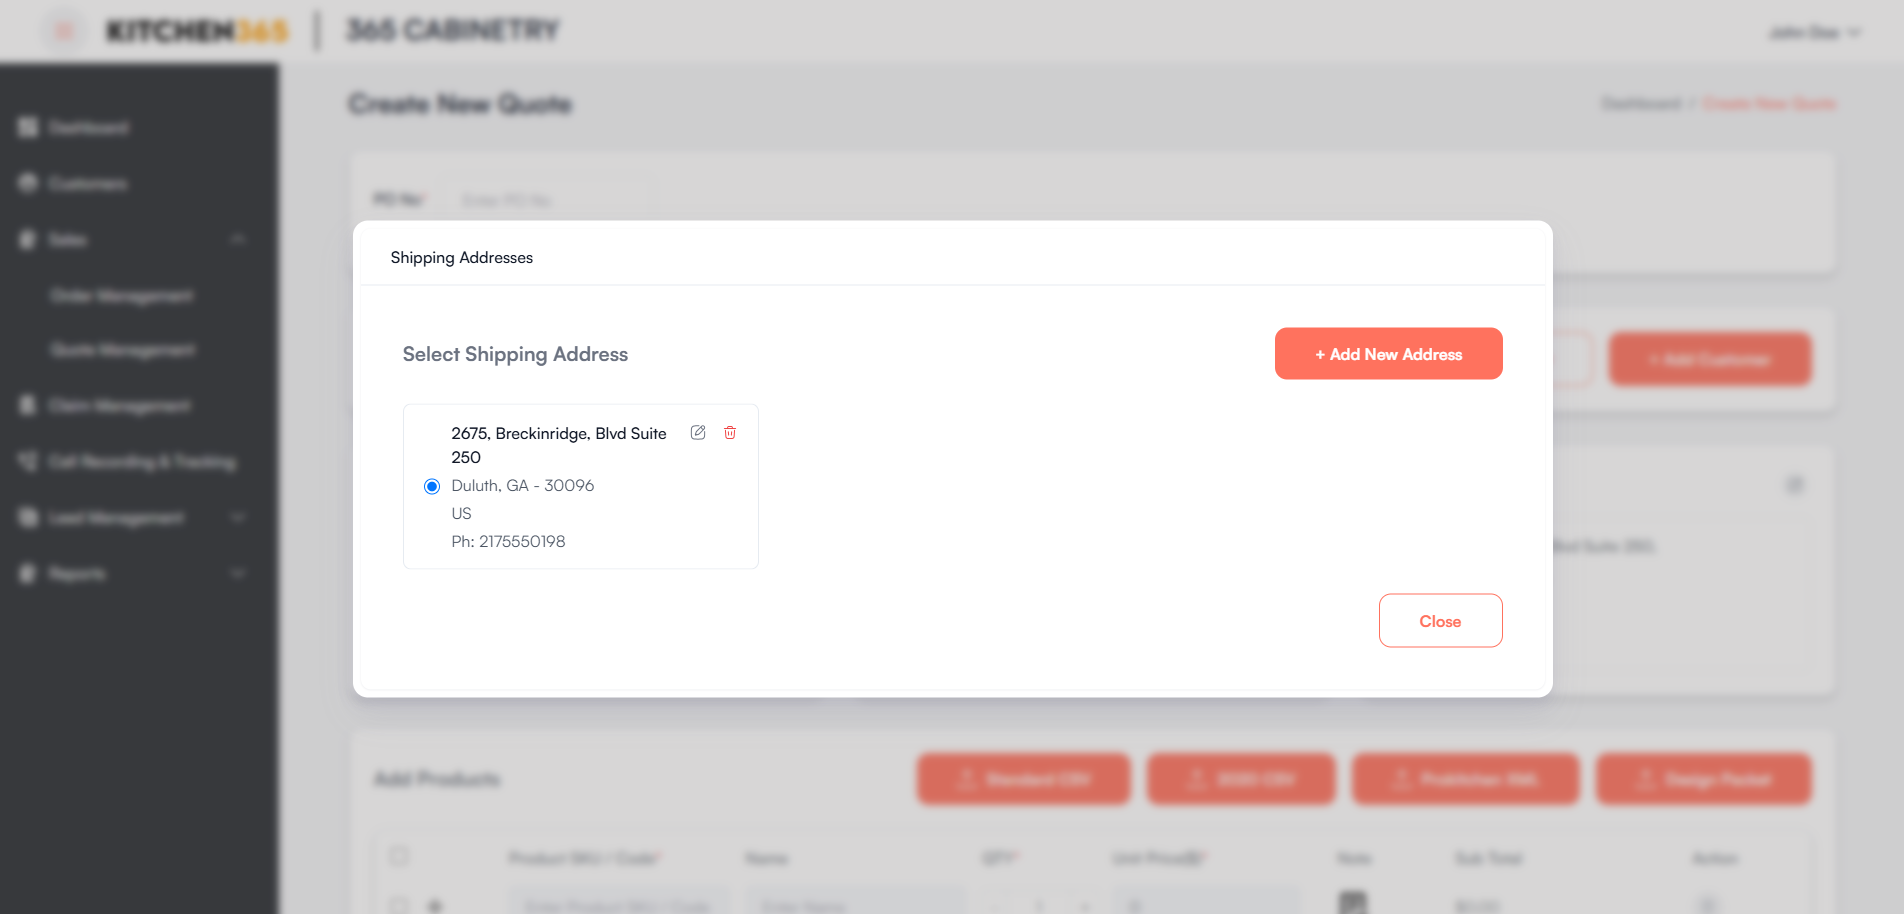
This popup allows users to manage and assign shipping addresses for the quote.
-
Select Existing Shipping Address
- Displays all existing addresses associated with the selected customer.
- Each address card includes:
- Street Address
- City, State, ZIP
- Country
- Phone Number
- A radio button lets you choose the address to use for this quote.
- ✏️ Edit: Opens the address in an editable form.
- 🗑️ Delete: Removes the address from the list after confirmation.
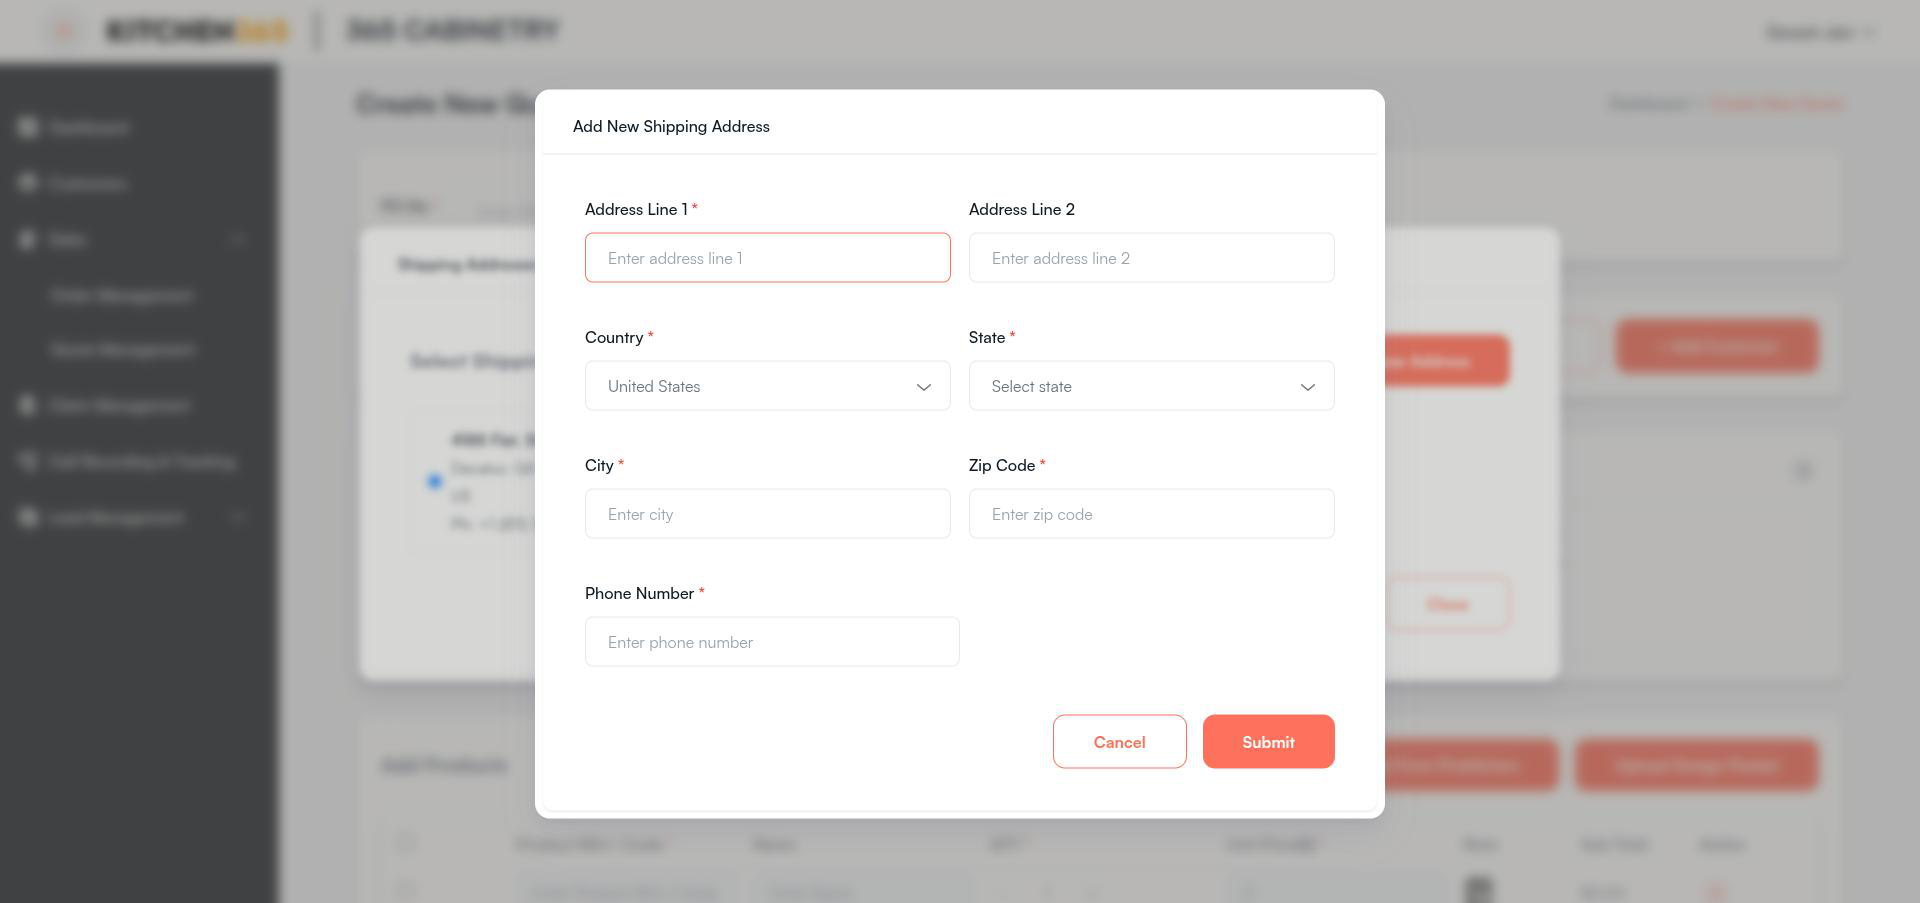
- + Add New Address
- Opens a form to input a new shipping address.
- The new address gets saved and associated with the selected customer.
- 🗙 Close Button
- Closes the popup without making changes.
⚠️ Note: You must select or add at least one shipping address before proceeding with quote creation.
vi. Add Items Manually
Admin can manually add products by entering the following information:
- Product SKU / Code
- Name
- Quantity
- Unit Price
- Product Note
Adding Product-Level Notes
- Each row includes a note icon for adding comments specific to that product.
Adding Quote-Level Notes
- Use the Additional Notes field below the item table to include any remarks for the entire quote.
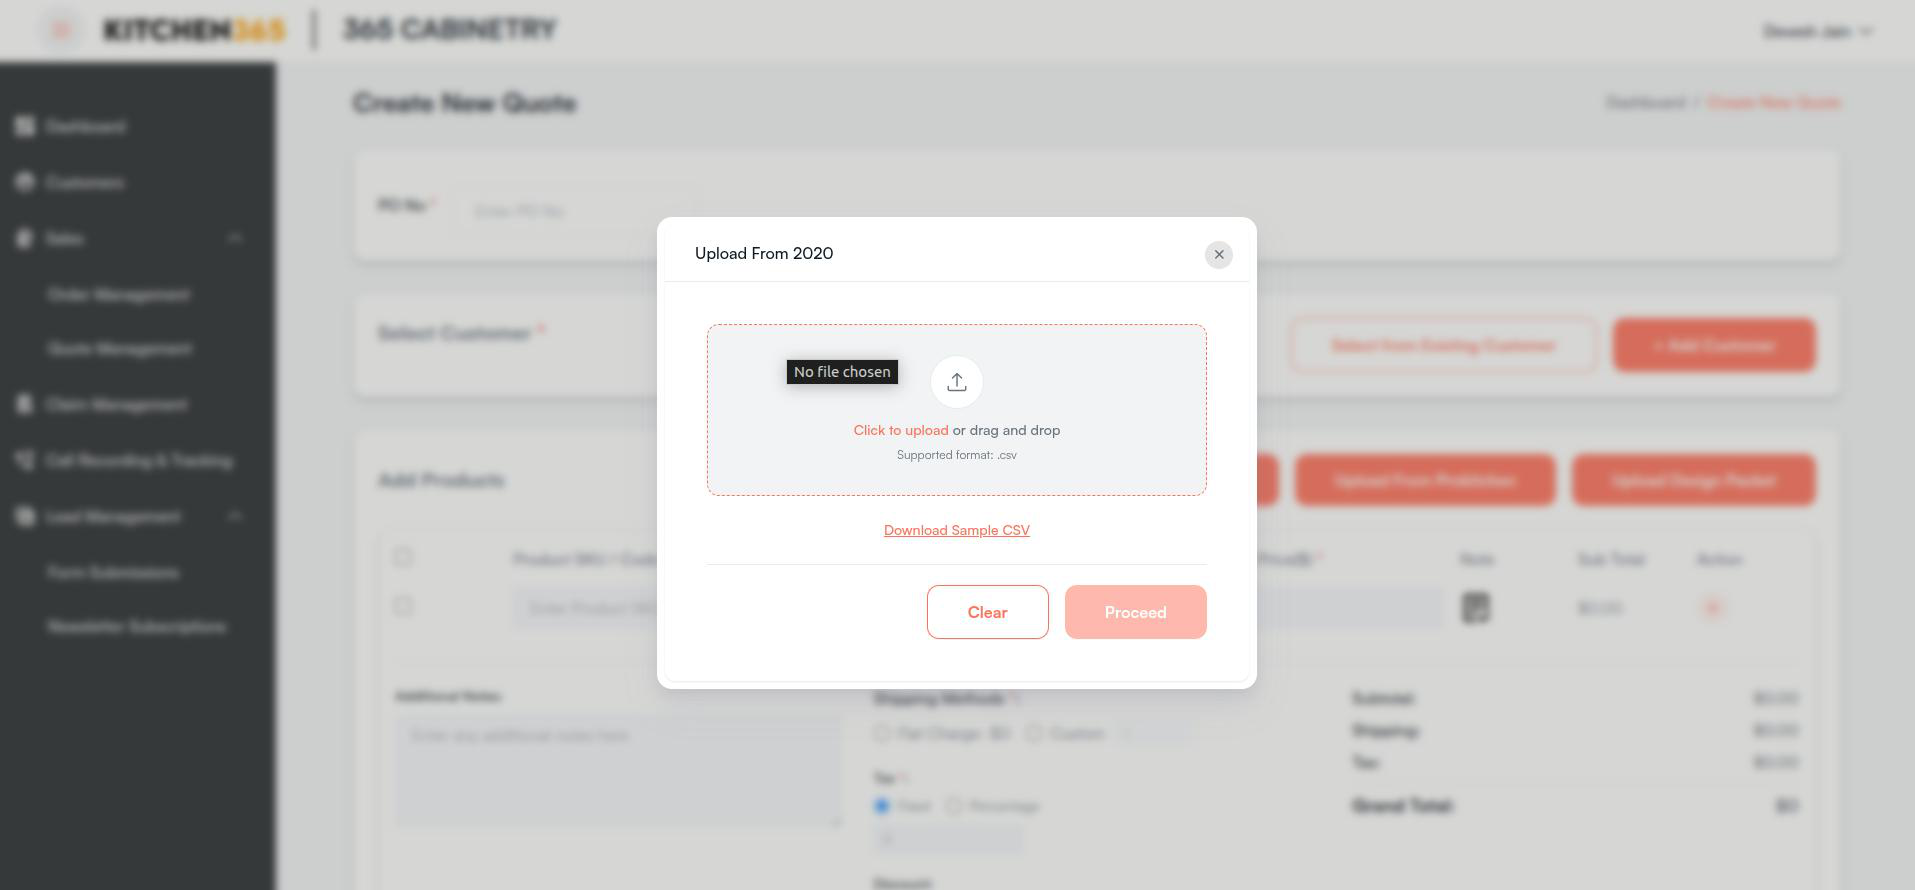
vii. Add Items Using 2020 Import (.csv)
- Click "Upload from 2020" to upload a
.csvfile containing product details generated by the 2020 design tool. - When you click "Upload from 2020", a popup appears to upload a file. In this popup, you can view a sample CSV file to understand the expected format and structure.
- This process will:
- Read the uploaded CSV file,
- Retrieve product details like SKU Code, Name / Description, Quantity, and Unit Price,
- Add all the products to the admin console.
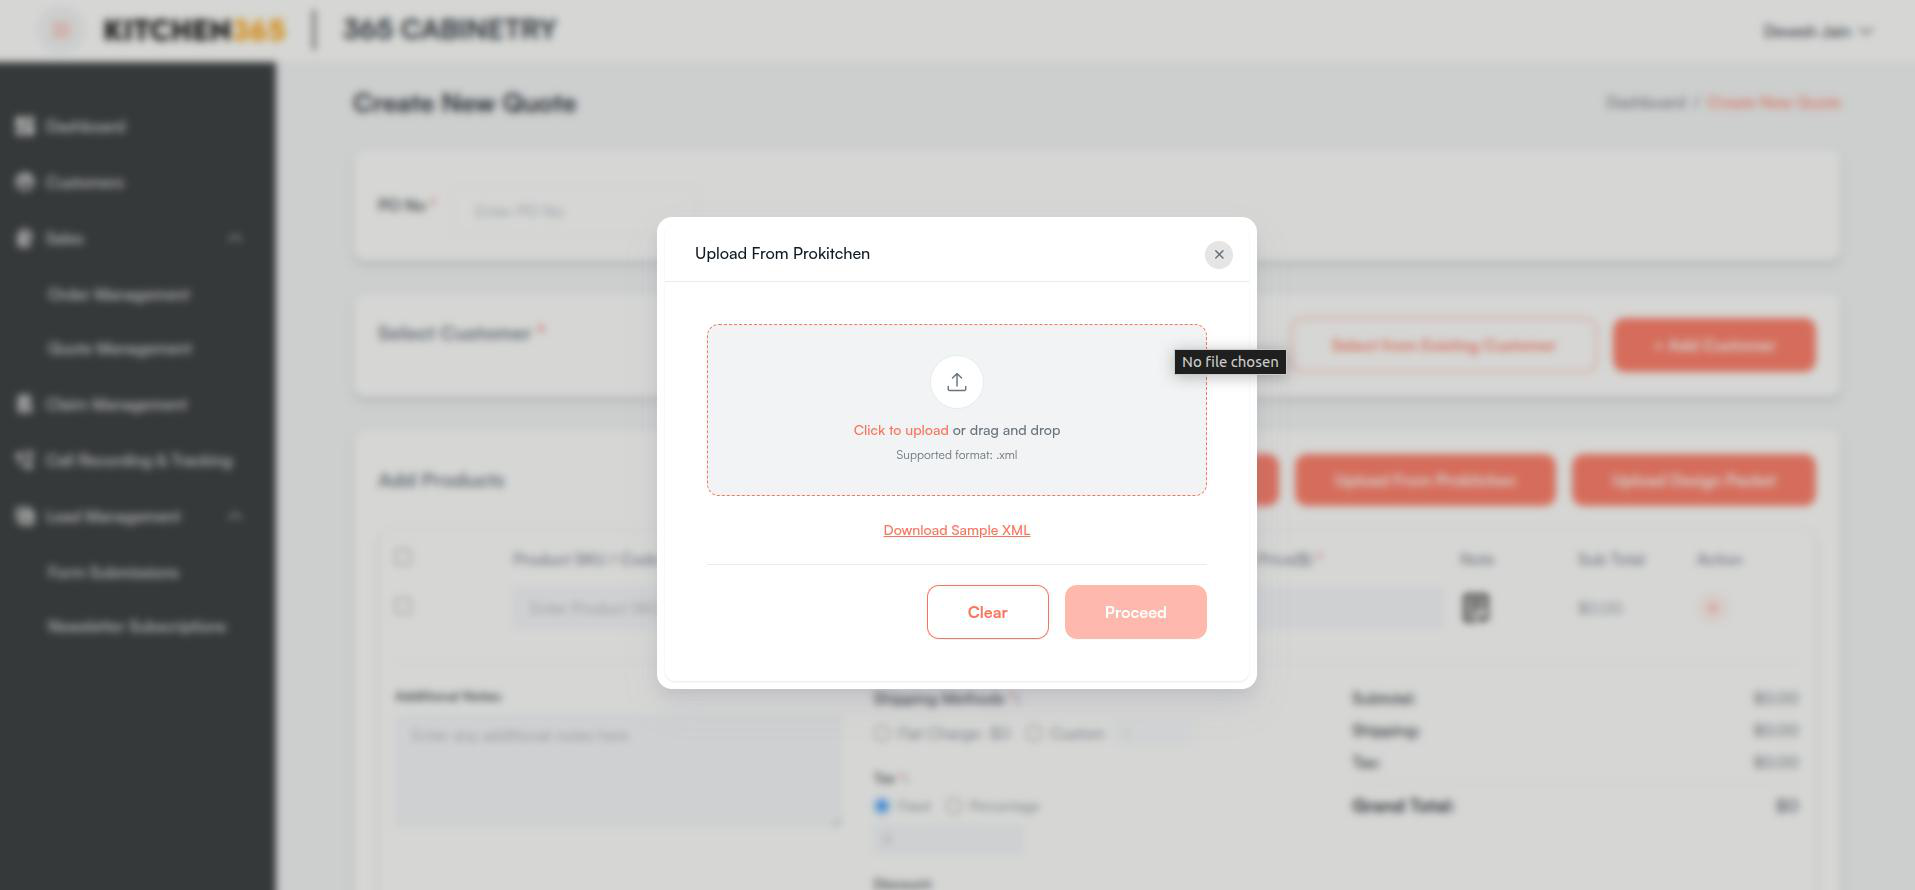
viii. Add Items Using ProKitchen Import (.xml)
- Click “Upload from ProKitchen” to upload an .xml file exported from the ProKitchen application.
- When you click on 'Upload from ProKitchen', a popup appears to upload a file. In this popup, you can view a sample CSV file to understand the expected format and structure.
- This process will read the uploaded XML file, retrieve the product details like SKU Code, Name / Description, Quantity & Unit Price, and add all the products to the admin console.
ix. Delete Product
- To delete a product from the product list, first select the product. Only then will the 'Delete Selected' button become visible. By clicking it, you'll be able to delete the selected product.
- There is also a delete button placed in front of each item row if any specific item must be deleted.
x. Shipping Method
- Flat Rate: Select “Flat Charge” to apply a predefined shipping fee.
- The value shown in Flat Rate comes from the shipping rates configuration, which shows the Flat Charge based on shipping address & the value of the items added.
- Custom Shipping: Select “Custom” to manually enter the shipping charge amount.
xi. Tax
- Fixed: Enter a flat tax amount manually.
- Percentage: Input a tax percentage which is applied to the subtotal.
xii. Discount
- Fixed: Enter a specific discount amount.
- Percentage: Input a tax percentage which is applied to the subtotal.
xiii. Upload Design Packet (.PDF)
Use “Upload Design Packet” to attach a design document (PDF) to the quote.
This PDF file will be:
- Shared with the user in the Quote Email
- Available to download from the Quote detail page
xiv. Save Quote / Save Quote & Send Email Function
- Save Quote: Saves the quote but doesn’t trigger any email notification to the customers.
- Save Quote & Send Email: Saves the quote and sends email notification to the customer.
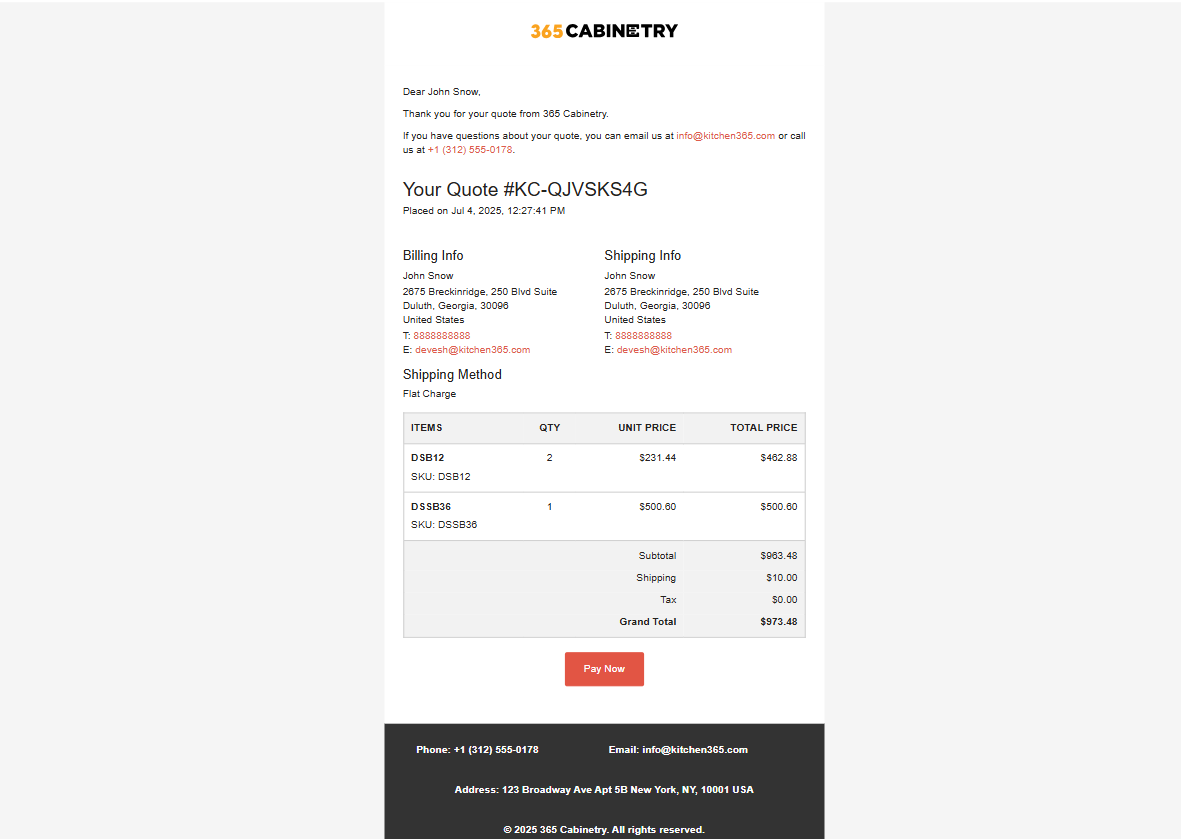
Customer will receive the above email upon clicking Save Quote & Send Email. To place an order, from this email customer can click on Pay Now and will be redirected to the page shown below.
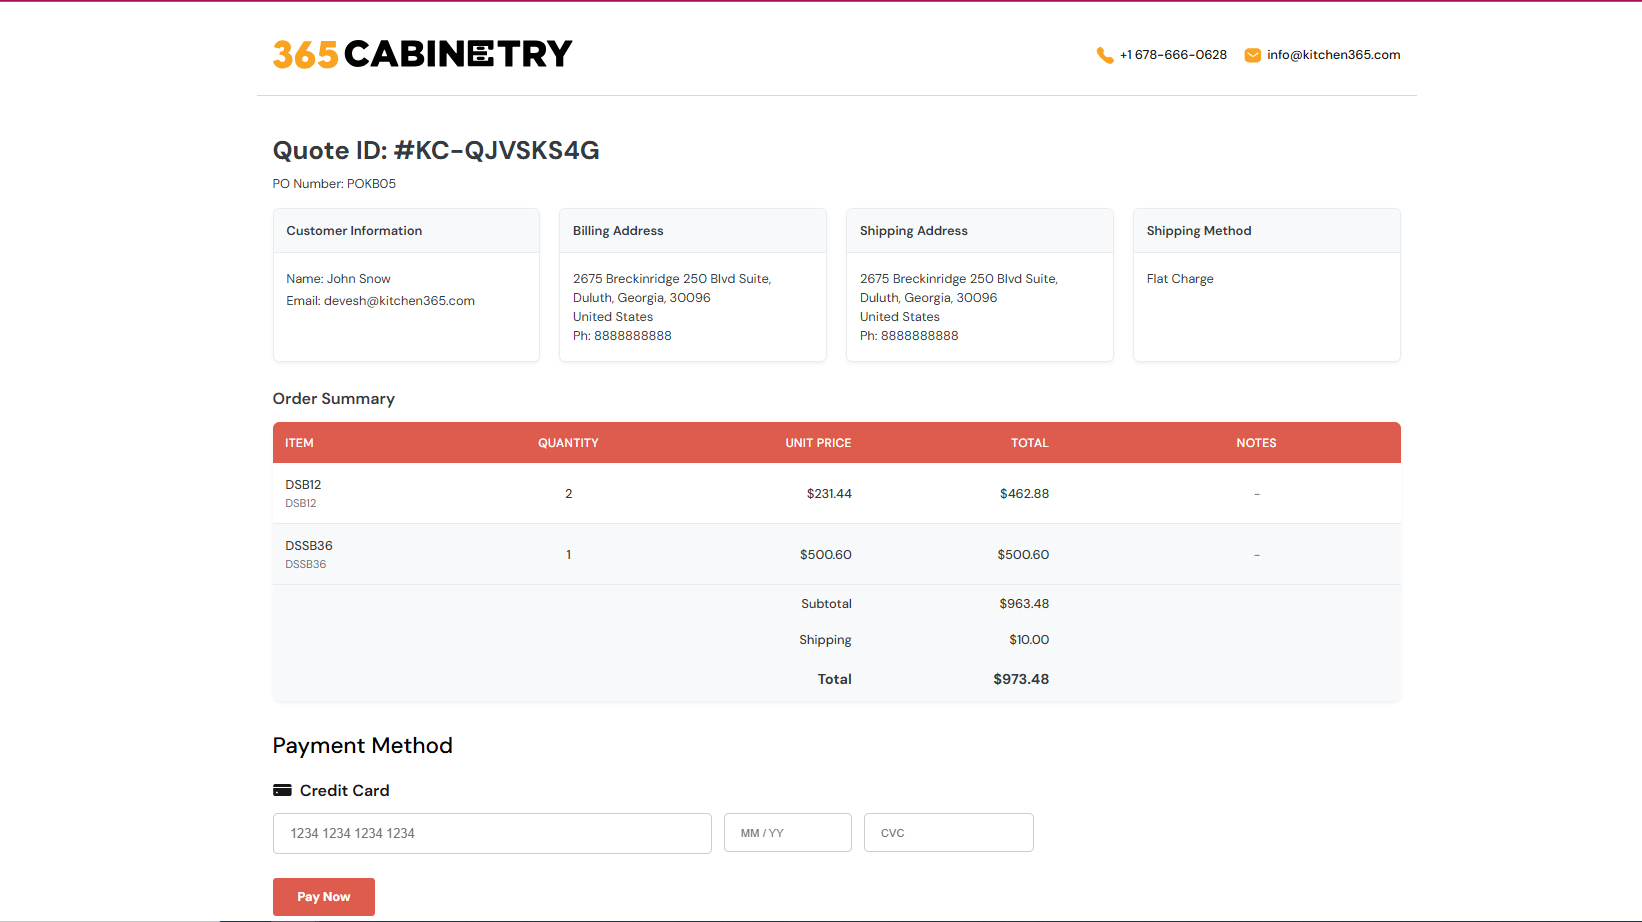
To place an order, customer need to enter the required payment details and click on Pay Now. Once done, the order will be successfully created. By doing so the customer has successfully converted a quote to order.
Another way to place an order is explained below.
xv. Directly Placing an Order
Another way to place an order is by visiting the Quote Detail page or by editing the quote. From there, you need to select a payment method and then place the order.
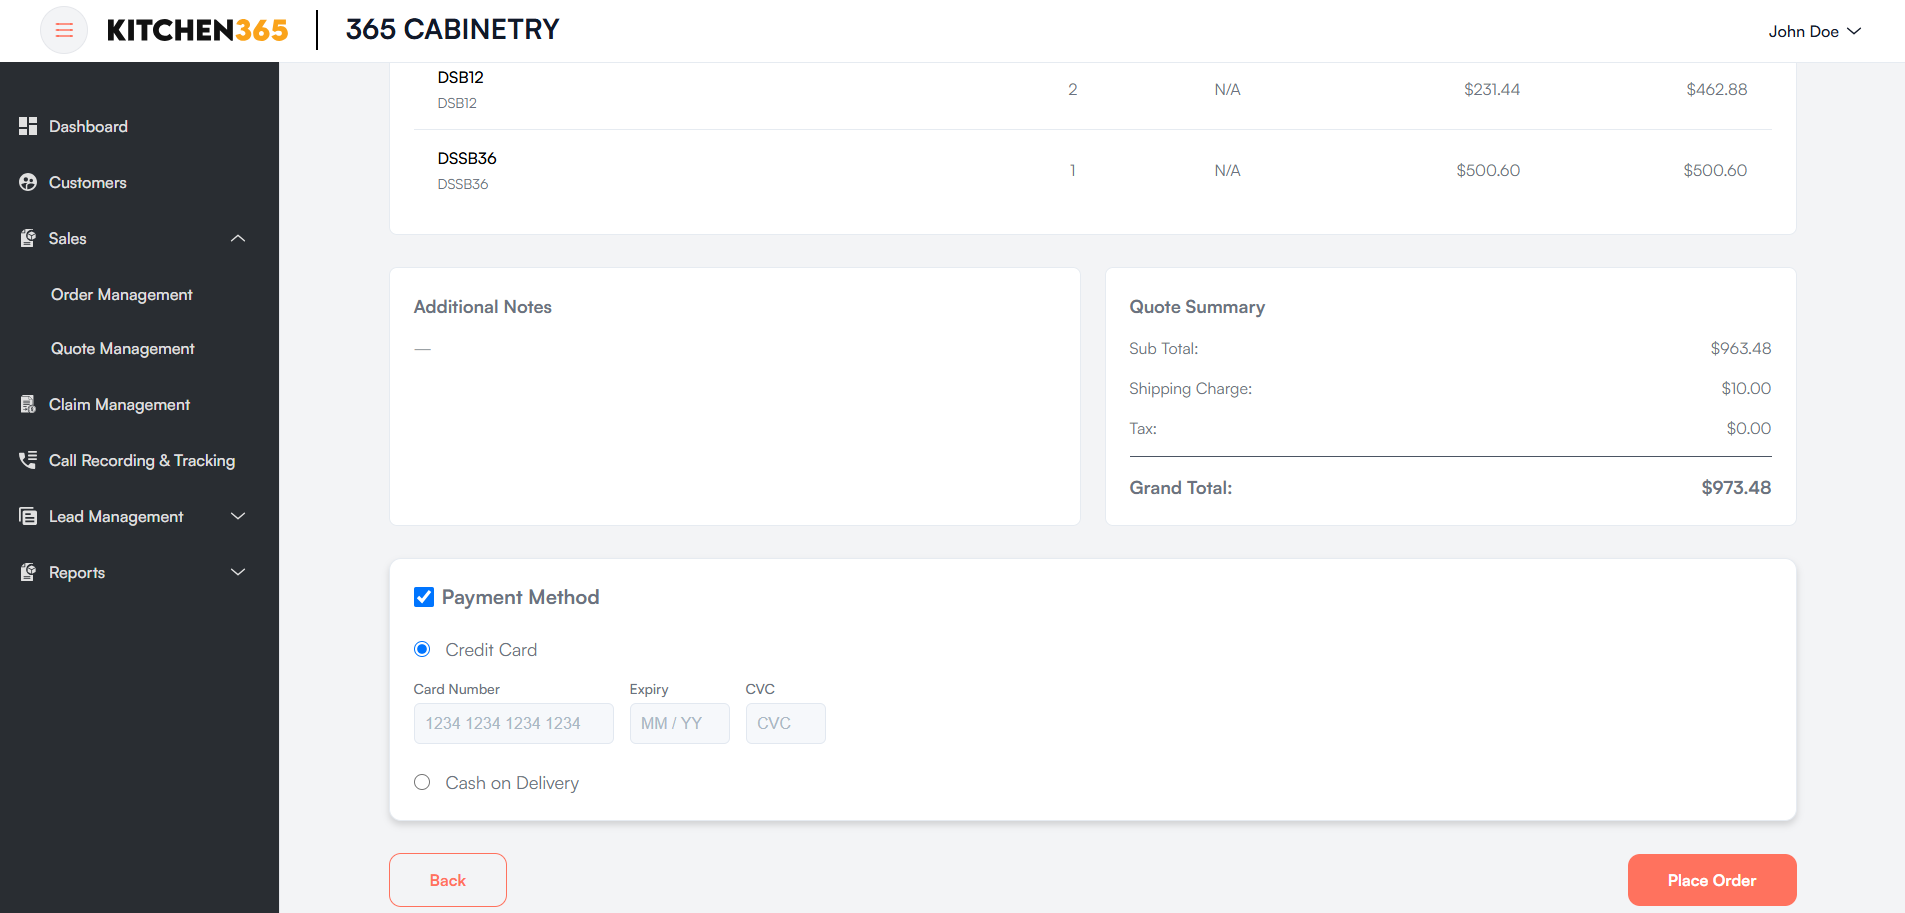
-
If you select Credit Card as the payment method, you will need to enter the required card details. Once selected any of the method, the Pay Now button will be visible.
- Click Pay Now to convert the filled quote directly into a confirmed order.
-
If you select Cash on Delivery, the Place Order button will be visible.
- Click Place Order to convert the filled quote directly into a confirmed order.
-
The button to proceed (either "Pay Now" or "Place Order") will only be enabled once a payment method is selected.
-
After placing the order, you can view it under Sales > Order Management.