Assets Management
The Assets Management module in the Kitchen365 Console v2.0.0 lets admin users store, organize, and manage digital files and folders for the tenant website. Files can be managed at the tenant level or scoped to individual customers.
Access
How to open Assets Management
- Log in to the Kitchen365 Console.
- In the left sidebar, click Assets Management.
The module provides a file-browser interface with two tabs:
| Tab | Purpose |
|---|---|
| My Files | Tenant-level files and folders not linked to a specific customer. |
| Customer Files | Files and folders associated with a selected customer. |
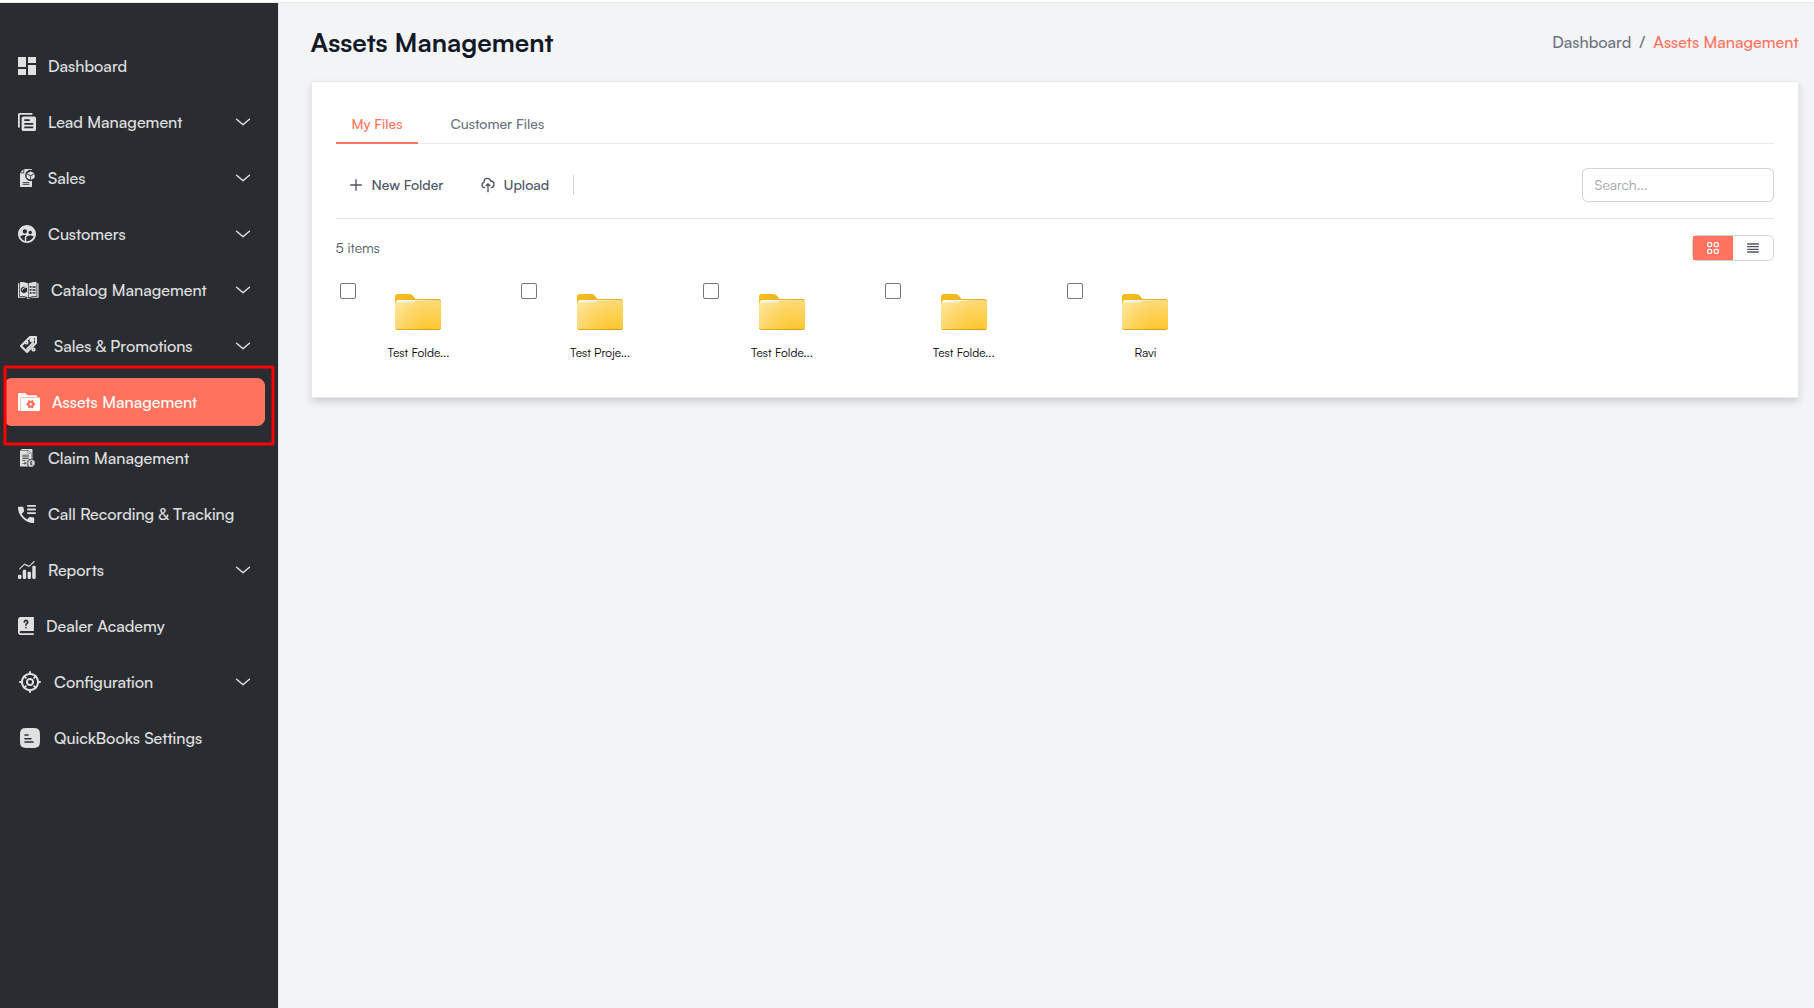
On the Customer Files tab, the customer dropdown is populated only when the signed-in user has customer view permission. Without that permission, customer selection is unavailable.
a. My Files
The My Files tab is the default view. It displays the tenant's root file system — folders and uploaded files that are not tied to any customer.
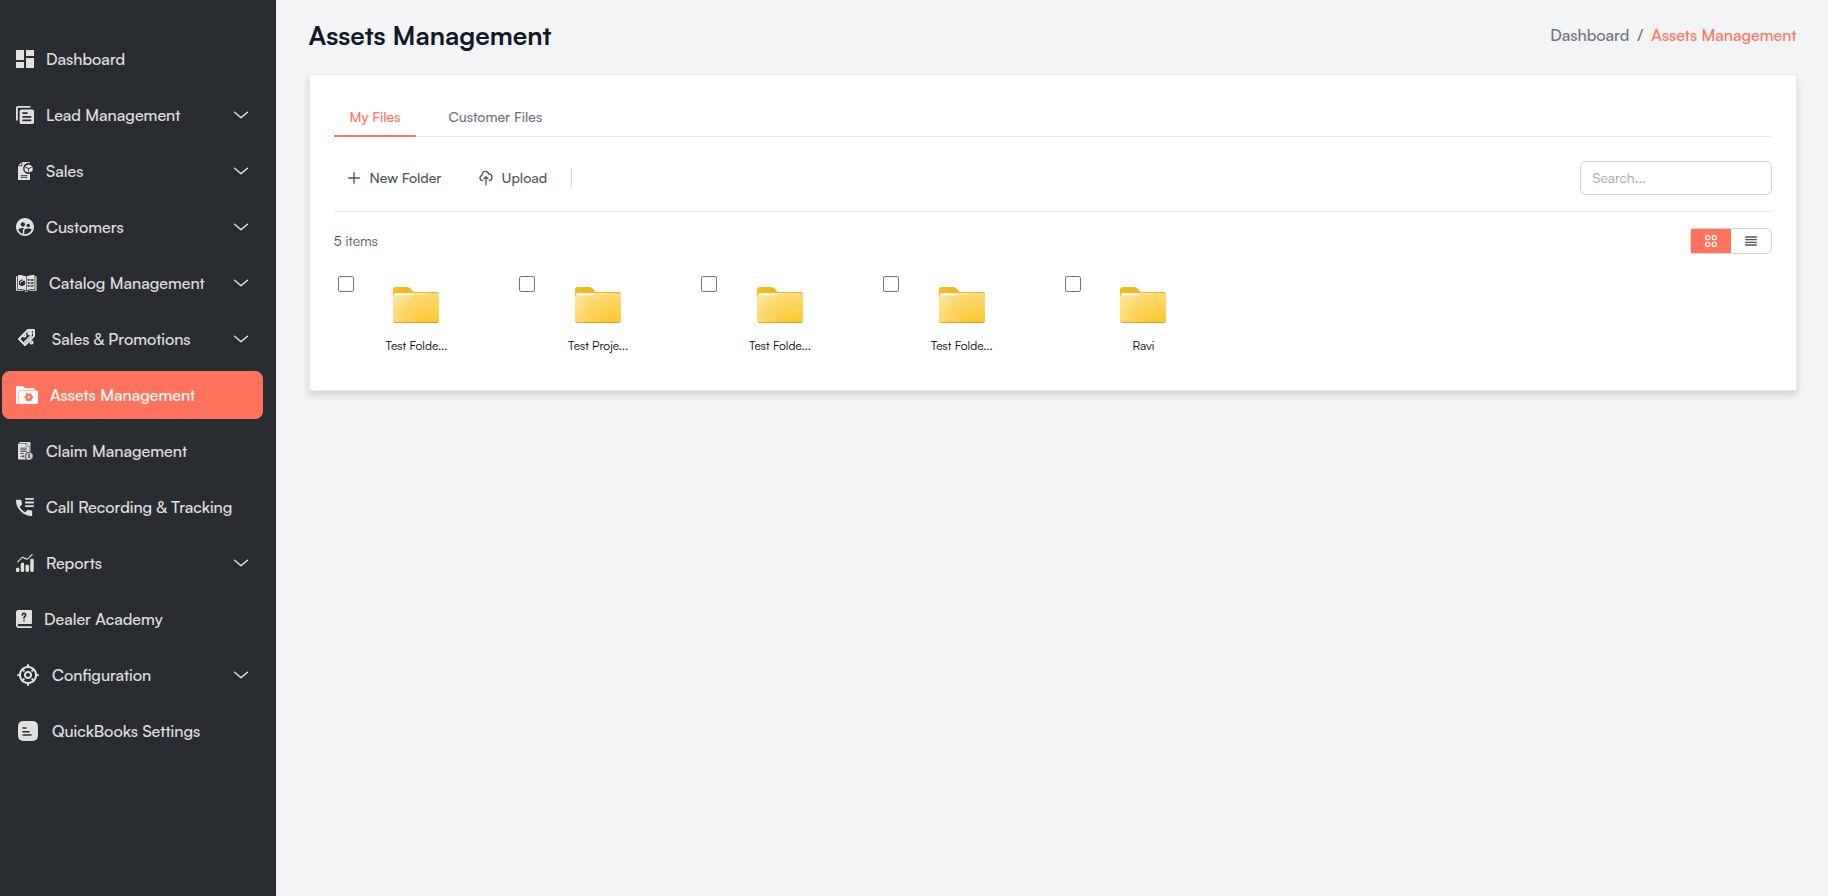
i. File Browser Layout
The main content area includes:
| Element | Description |
|---|---|
| Breadcrumb | Shows the current folder path. Click Home or any parent folder to navigate back. |
| Action Bar | New Folder, Upload, bulk Delete, and Clear Selection when items are selected. |
| Search | Filters files and folders in the current directory by name (placeholder: "Search..."). |
| Item Count | Displays the total number of items in the current folder (e.g., "5 items"). |
| View Toggle | Switch between Grid and List view. |
| File System | Folders and files for the current directory. |
List View Columns
| Column | Description |
|---|---|
| Name | Folder or file name with type icon. |
| Type | Folder or the file MIME/type. |
| Size | File size (folders show -). |
| Modified | Created/upload date for the item. |
Grid View
Folders and files are displayed as cards with icons. Supported file types show distinct icons for images, PDFs, Word, Excel, PowerPoint, ZIP, and generic files.
ii. Create Folder
Click New Folder in the action bar (or use the empty-state button) to open the Create New Folder modal.
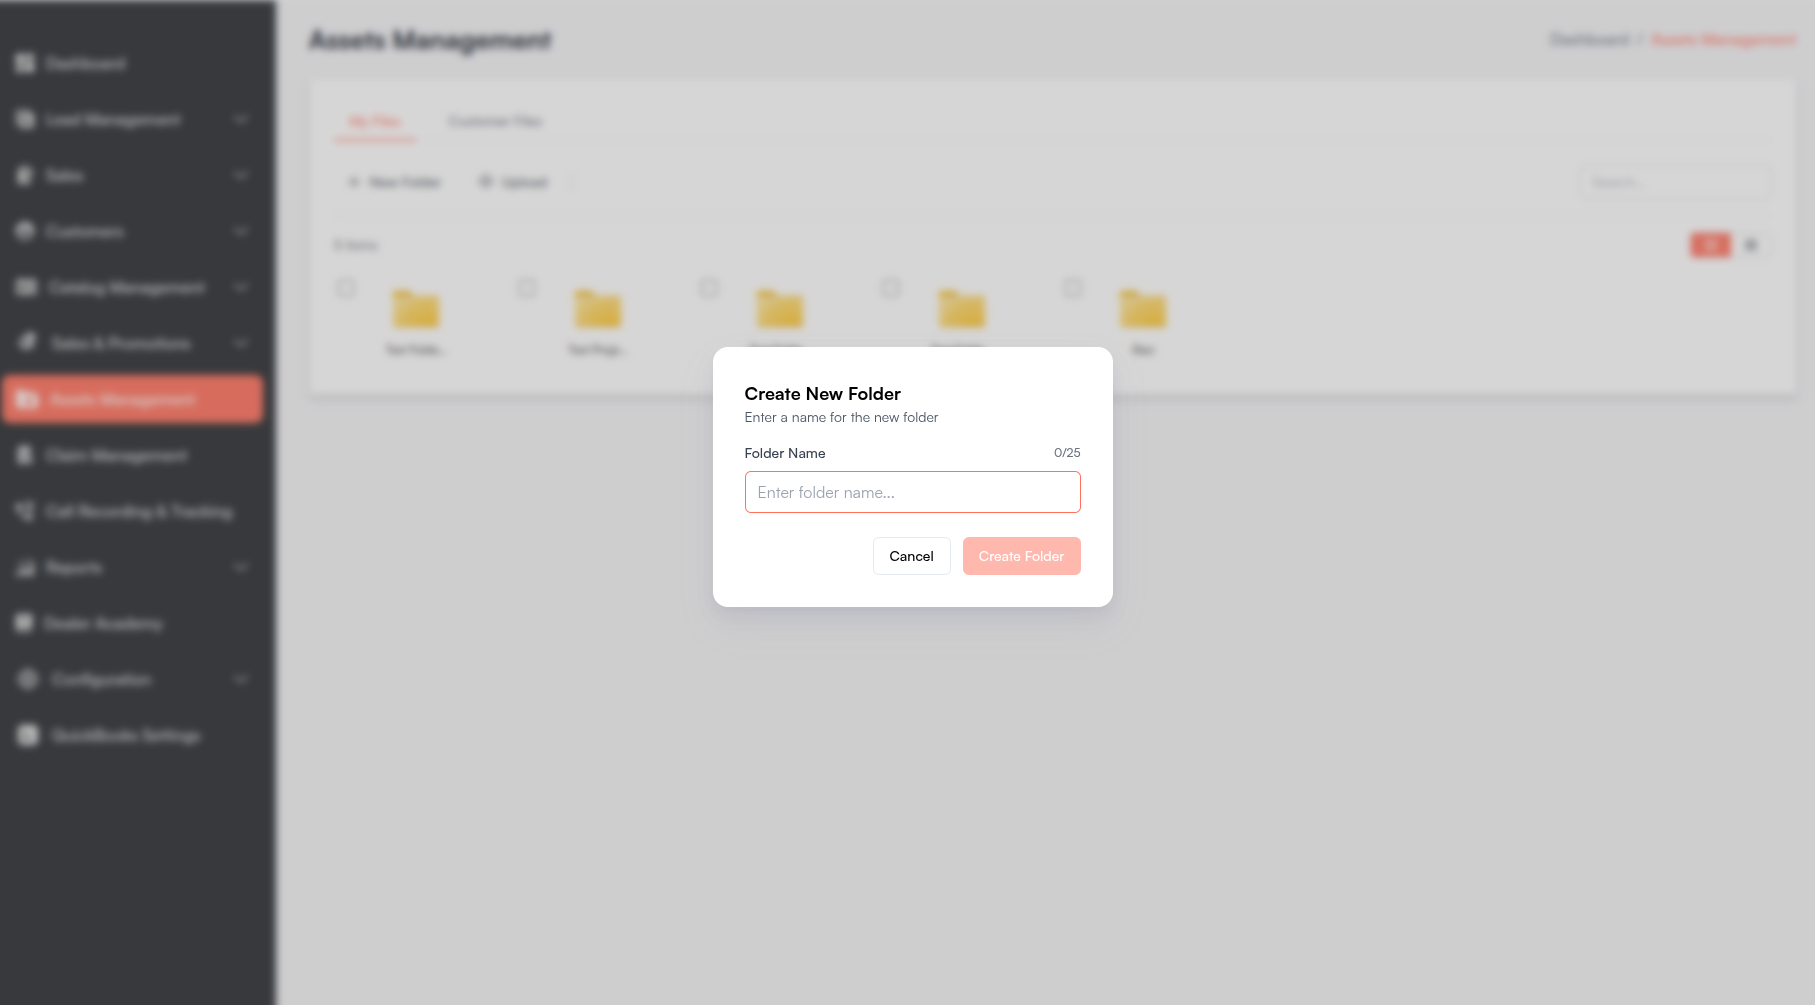
| Field | Description |
|---|---|
| Folder Name | Required. Maximum 25 characters. |
- Cancel — Closes the modal without creating a folder.
- Create Folder — Creates the folder in the current directory.
The new folder is created under the currently open folder. If you are at the root level, the folder is created at the top level.
iii. Upload Files
Click Upload in the action bar (or use the empty-state button) to open the Upload Files modal.
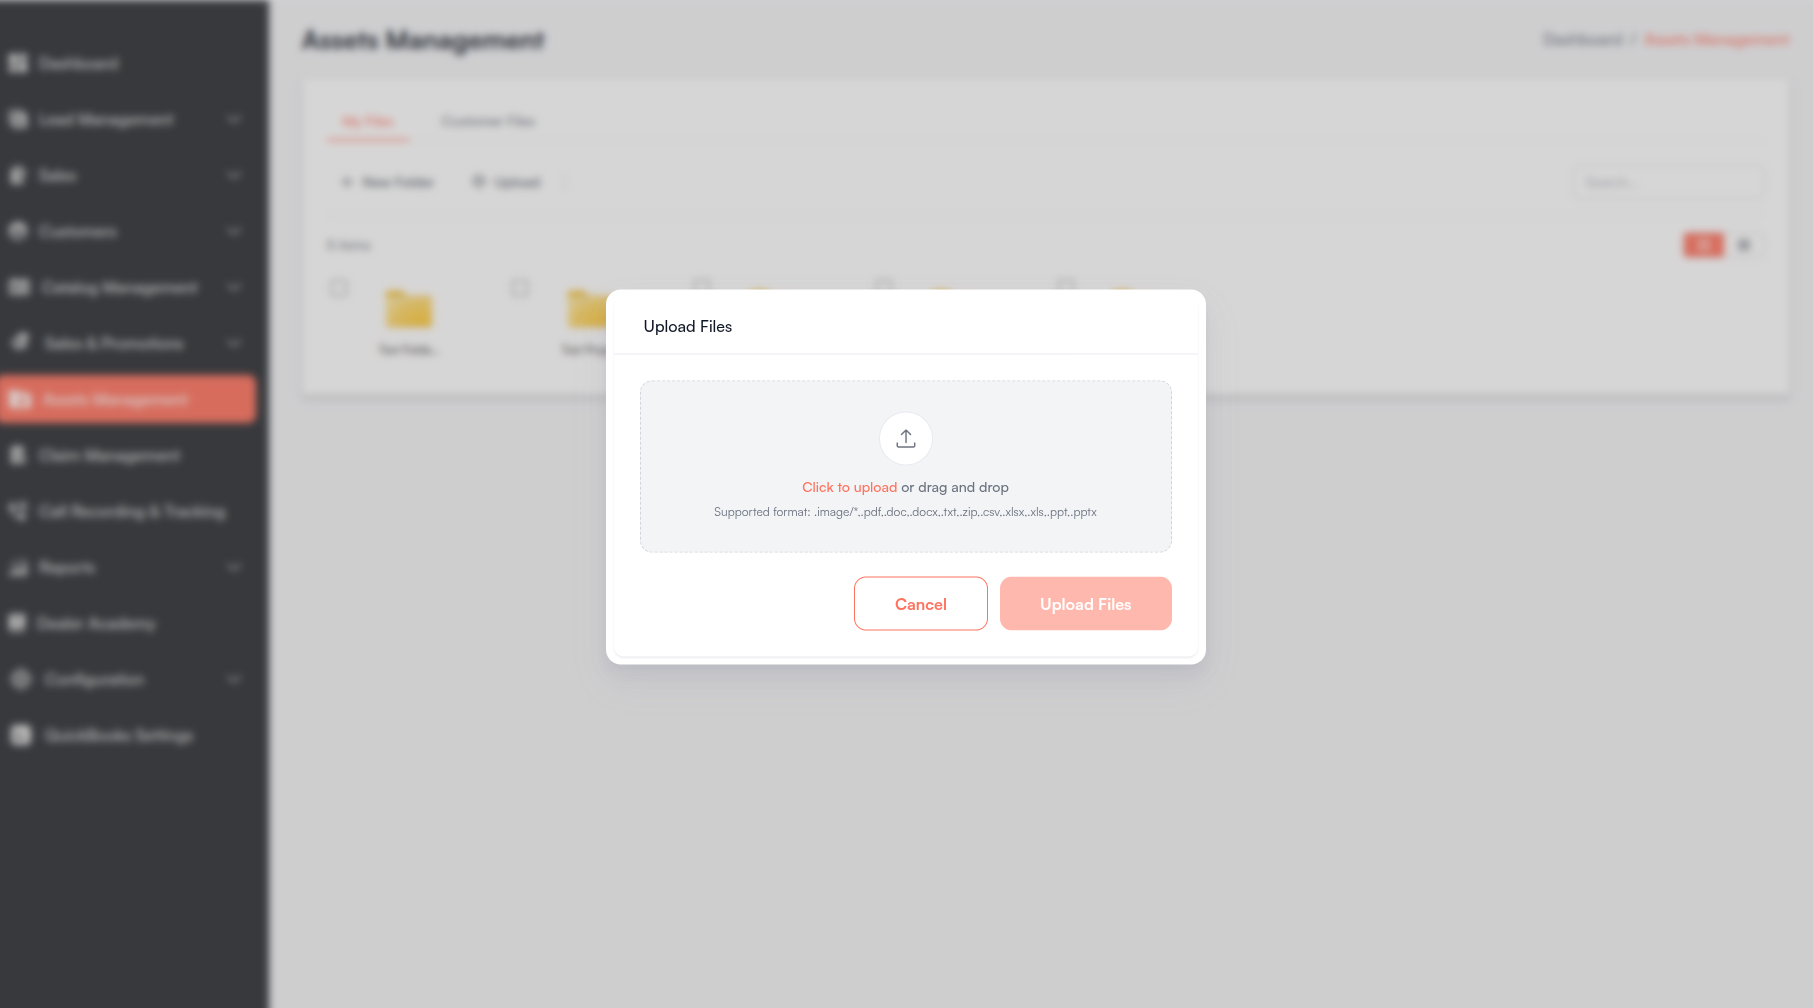
| Element | Description |
|---|---|
| Drop Zone | Click to browse or drag and drop files. |
| Selected Files | Lists chosen files with name, size, and a remove option before upload. |
| Upload Files | Starts the upload into the current folder. |
| Cancel | Closes the modal without uploading. |
Supported File Types
Images, PDF, Word (.doc, .docx), plain text, CSV, Excel (.xls, .xlsx), PowerPoint (.ppt, .pptx), and ZIP archives.
Upload Limits (Defaults)
These limits can be overridden per tenant via tenant attributes:
| Rule | Default Limit |
|---|---|
| Max files per upload | 10 files |
| Max single file size | 50 MB |
| Max total upload size | 200 MB |
| Max filename length | 100 characters |
Validation errors (unsupported type, size exceeded, invalid filename characters) are shown as toast messages. A progress indicator appears in the top-right corner while files upload sequentially.
iv. File & Folder Actions
Select one or more items using checkboxes, or right-click an item to open the context menu.
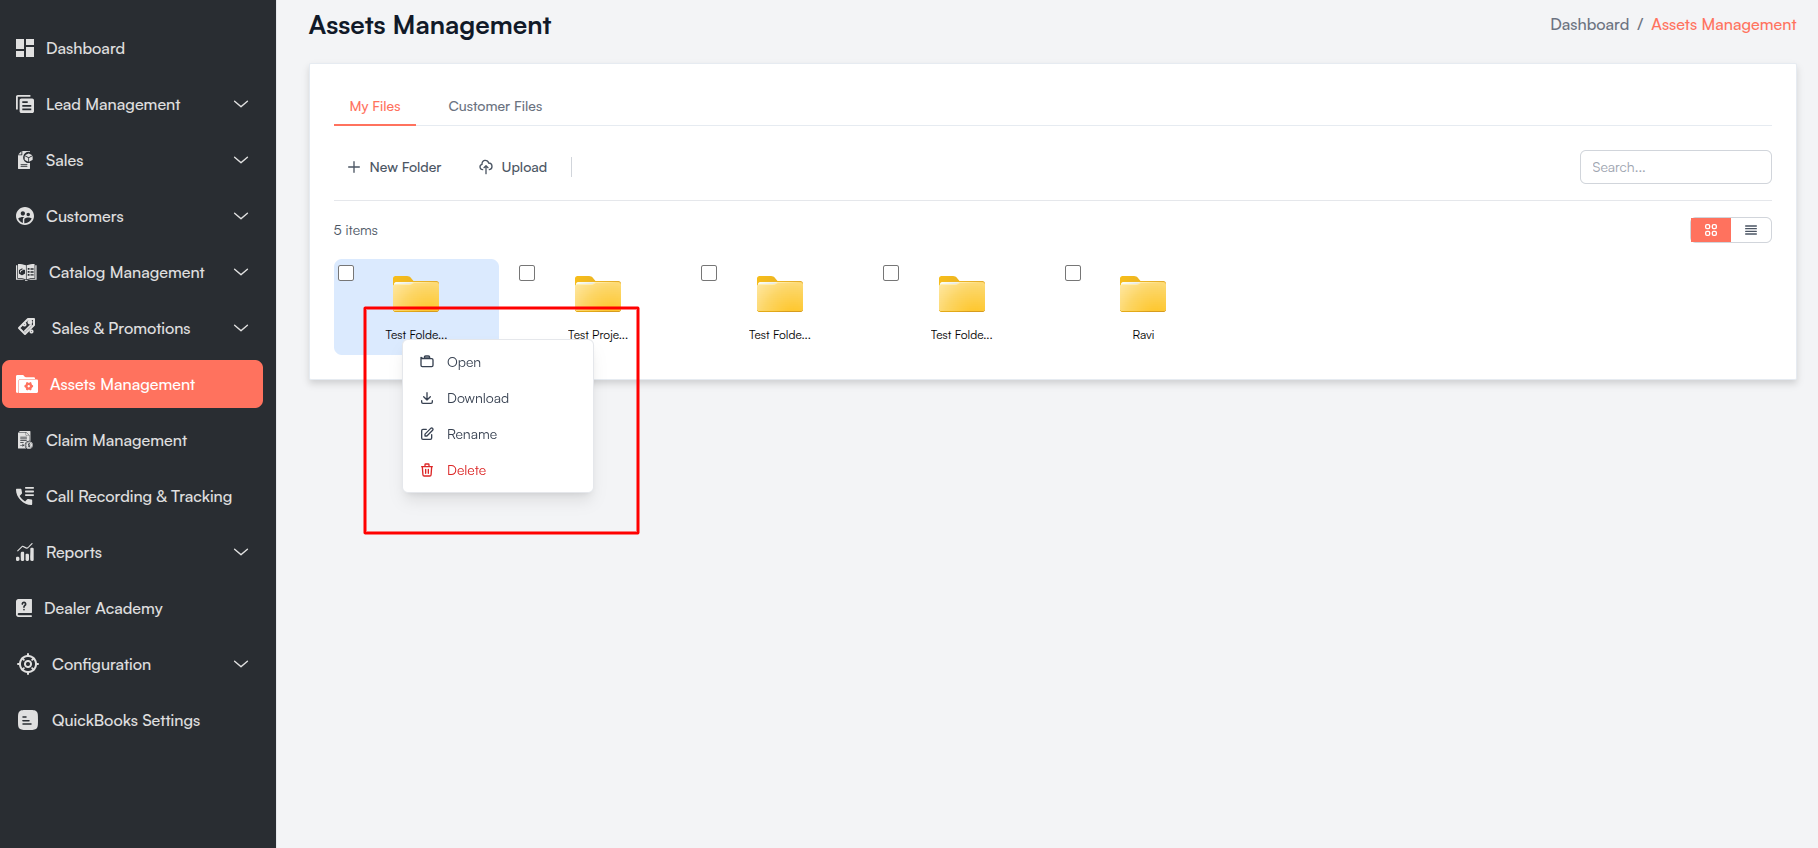
| Action | Folders | Files | Description |
|---|---|---|---|
| Open | ✅ | — | Opens the folder (double-click also works). |
| Preview | — | ✅ | Opens a preview modal for supported file types. |
| Download | ✅ | ✅ | Downloads the file, or a .zip archive for a folder. |
| Rename | ✅ | ✅ | Opens the rename modal (keyboard shortcut: F2). |
| Delete | ✅ | ✅ | Opens a confirmation dialog (keyboard shortcut: Delete). |
Bulk Delete
When multiple items are selected, the action bar shows Delete and Clear Selection. Bulk delete removes all selected folders and files after confirmation.
Preview
Preview is available for images, PDFs, Word, Excel, PowerPoint, ZIP, video, audio, and text files. Unsupported types show a download option instead.
Rename Rules
| Rule | Detail |
|---|---|
| Max name length | 50 characters (excluding file extension). |
| Folder names | Letters, numbers, spaces, dashes, and underscores. |
| File extension | Cannot be changed when renaming a file. |
| Invalid characters | `< > : " / \ |
v. Empty State
When a folder has no files or folders, the page shows:
- "This folder is empty"
- Quick actions: New Folder and Upload Files
When a search returns no results:
- "No results found"
- Message indicating no files or folders match the search term.
b. Customer Files
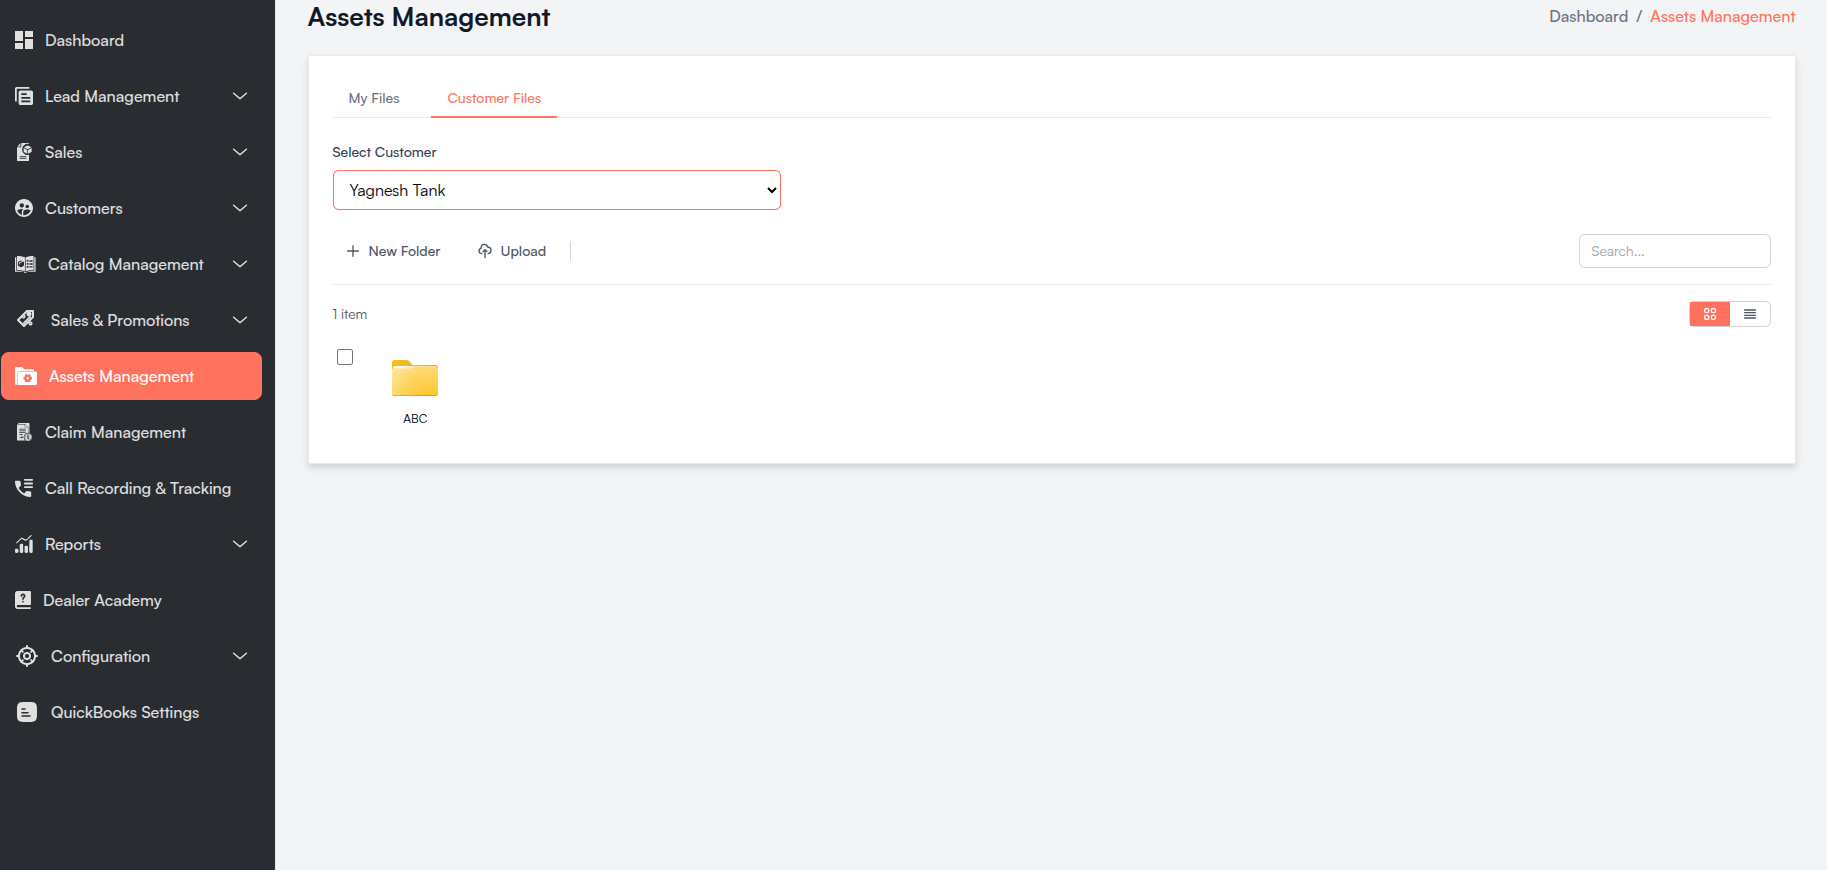
The Customer Files tab lets admin users browse and manage digital assets for a specific customer.
i. Select Customer
A Select Customer dropdown appears at the top of the tab. Choose a customer to load their file system.
| State | Behavior |
|---|---|
| No customer selected | Shows: "Please select a customer to view their files and folders." |
| Customer selected | Loads folders and files scoped to that customer. |
All actions available on My Files — create folder, upload, rename, delete, preview, download, search, and grid/list toggle — work the same way within the selected customer's file space.
Uploaded files and folders created on this tab are associated with the selected customer.
c. Customer Detail View
Customer files can also be viewed from the Customer Details page under the Assets Management section. This read-only embedded view shows the customer's folders and files with breadcrumb navigation, search, and grid/list toggle — without create, upload, delete, or rename actions.
Keyboard Shortcuts
| Shortcut | Action |
|---|---|
| Enter | Open selected folder |
| F2 | Rename selected item |
| Delete | Delete selected item |
| Escape | Close context menu |