Claim Management
The Claim Management module in the Kitchen365 Console v2.0.0 lets admin users view, track, and manage claims submitted by customers related to their orders. Use it to handle issues such as damaged goods, missing items, or other order complaints.
- Claims are linked to orders managed in Order Management.
- Claim totals also appear on the Dashboard.
Access
How to open Claim Management
- Log in to the Kitchen365 Console.
- In the left sidebar, click Sales > Claim Management.
Customers submit claims from the frontend website. Claims cannot be created manually from the Console.
a. Claim List
The main listing table displays all claims submitted from the frontend website.
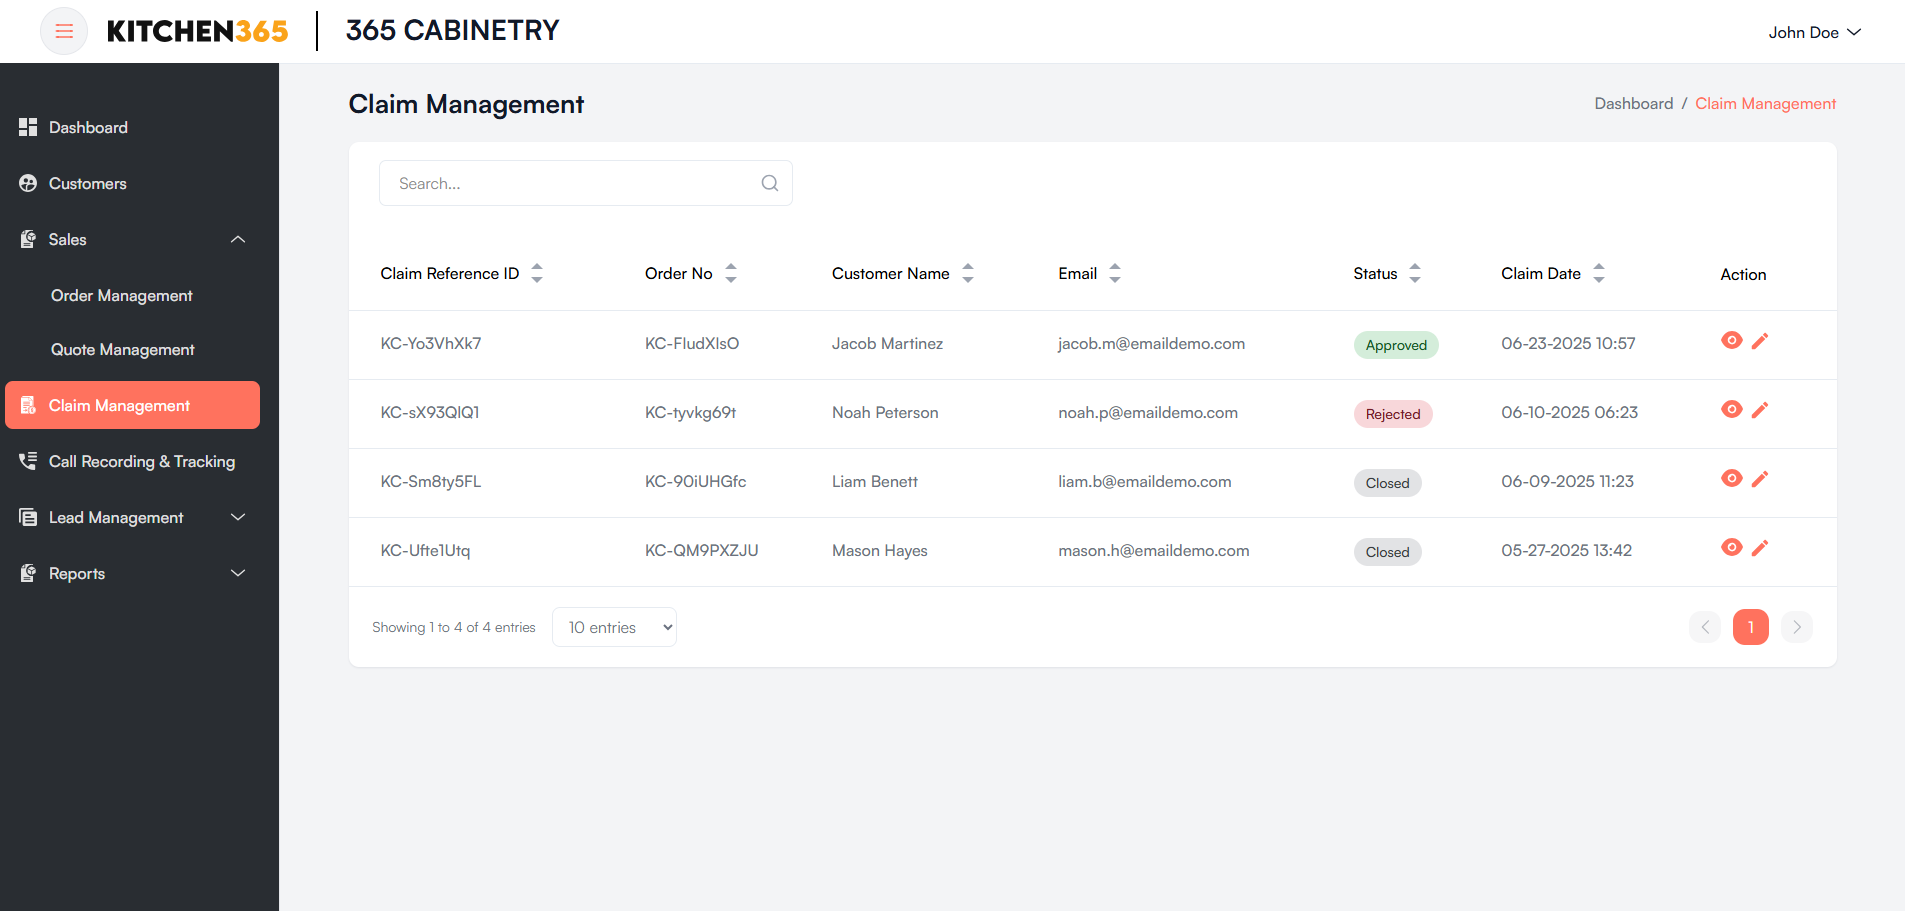
| Column | Description |
|---|---|
| Claim Reference ID | Unique identifier for each claim. |
| Order No. | Linked order number against which the claim was raised. |
| Customer Name | Name of the customer who raised the claim. |
| Customer's email address used for communication and claim reference. | |
| Status | Current claim status (e.g., Open, Closed). Displayed with a label chip. |
| Claim Date | Date and time when the claim was submitted. |
| Action | View 🔍 and Edit ✏️ icons. |
All columns except Action are sortable. Click column headers to sort ascending or descending.
i. Search Bar
- Located at the top of the table.
- Placeholder: "Search..."
- Filter claims by customer name, email, Order No., or Claim Reference ID.
ii. Pagination
- Located at the bottom of the table.
- Shows "Showing X to Y of Z entries".
- Page size options: 10 / 25 / 50 / 75 / 100 entries.
b. Claim View
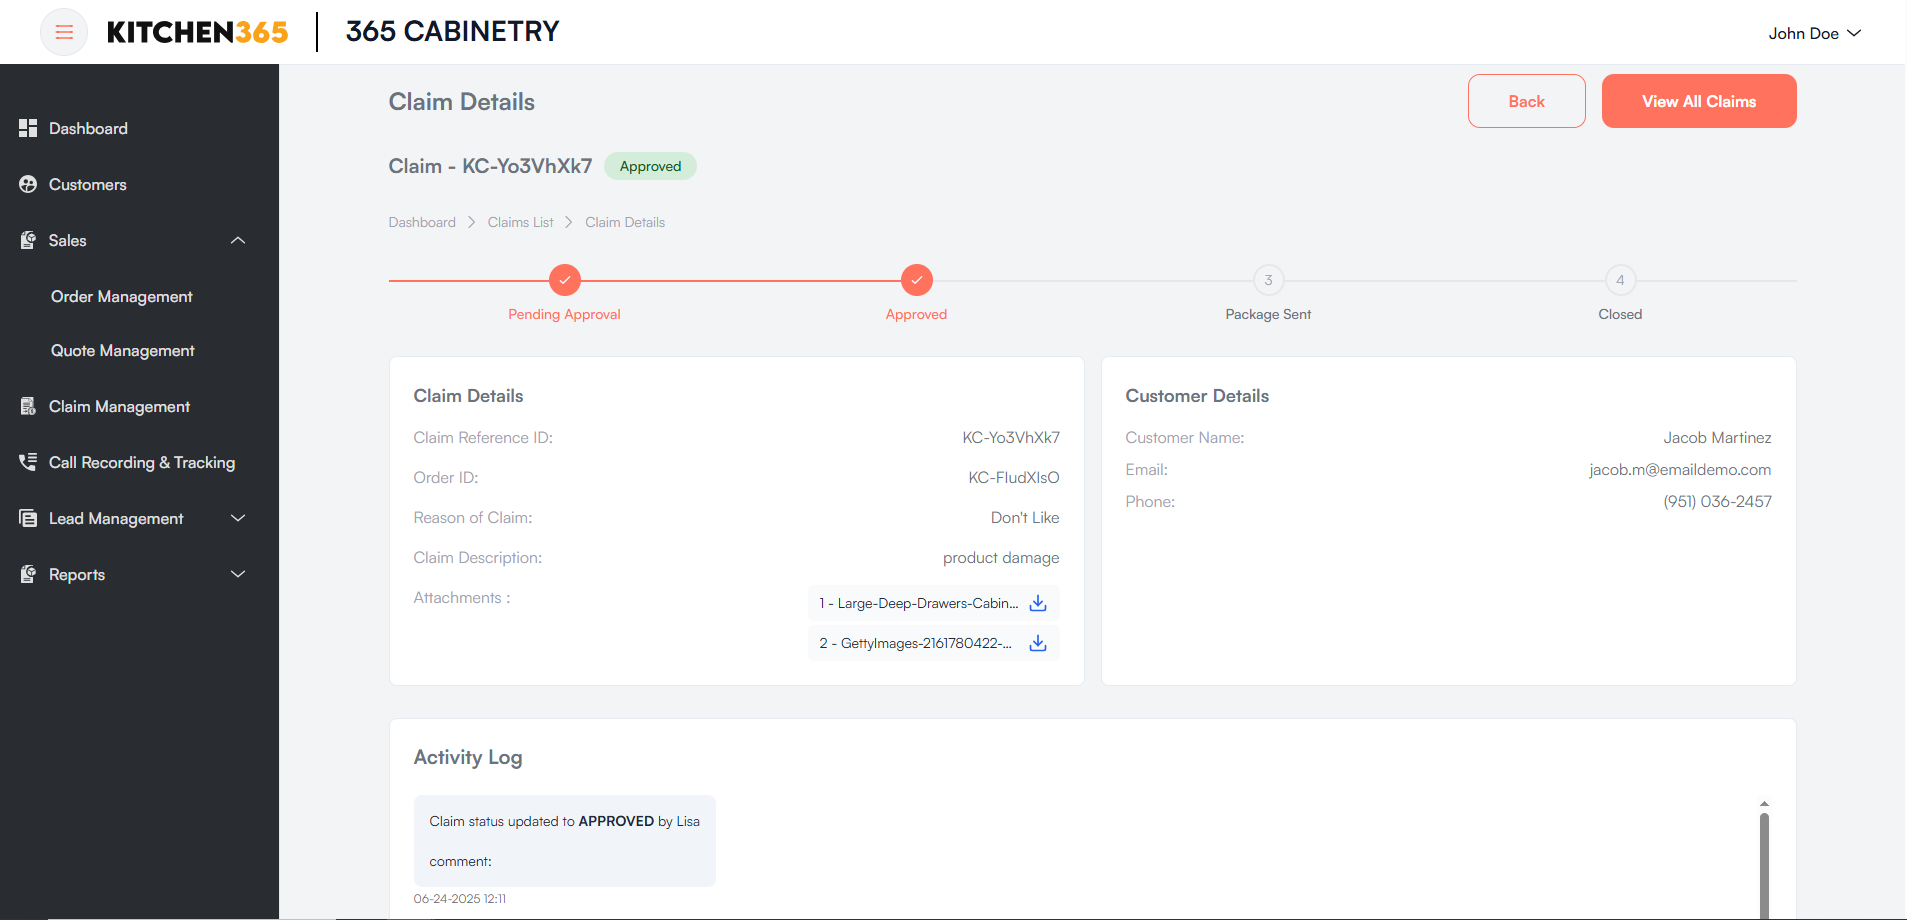
The Claim Details page shows the status and full information for a specific customer claim, including contact details, reason, attachments, and an activity timeline.
i. Claim Status Tracker
A visual timeline displays the stages of the claim:
| Step | Description |
|---|---|
| 1. Pending Approval | Claim submitted and awaiting review. |
| 2. Approved | Claim has been approved. |
| 3. Package Sent | Replacement or resolution package has been sent. |
| 4. Closed | Claim is resolved and closed. |
Each completed step is marked with a check icon.
ii. Claim Details Section
| Field | Description |
|---|---|
| Claim Reference ID | Unique ID for the claim. |
| Order ID | Original order ID. |
| Reason of Claim | Description of the issue (e.g., Wrong Color). |
| Attachments | Files related to the claim (images or documents). Download attachments from this section. |
iii. Customer Details Section
Displays the contact details of the customer who raised the claim.
iv. Activity Log
Shows the complete timeline of actions taken on the claim. Each entry includes:
- Status update (e.g., CLOSED, PACKAGE_SENT, REJECTED)
- Timestamp
- Action performed by
- Optional comments
v. Navigation Buttons
| Button | Description |
|---|---|
| Back | Returns to the previous page. |
| View All Claims | Navigates back to the full claim list. |
c. Claim Edit
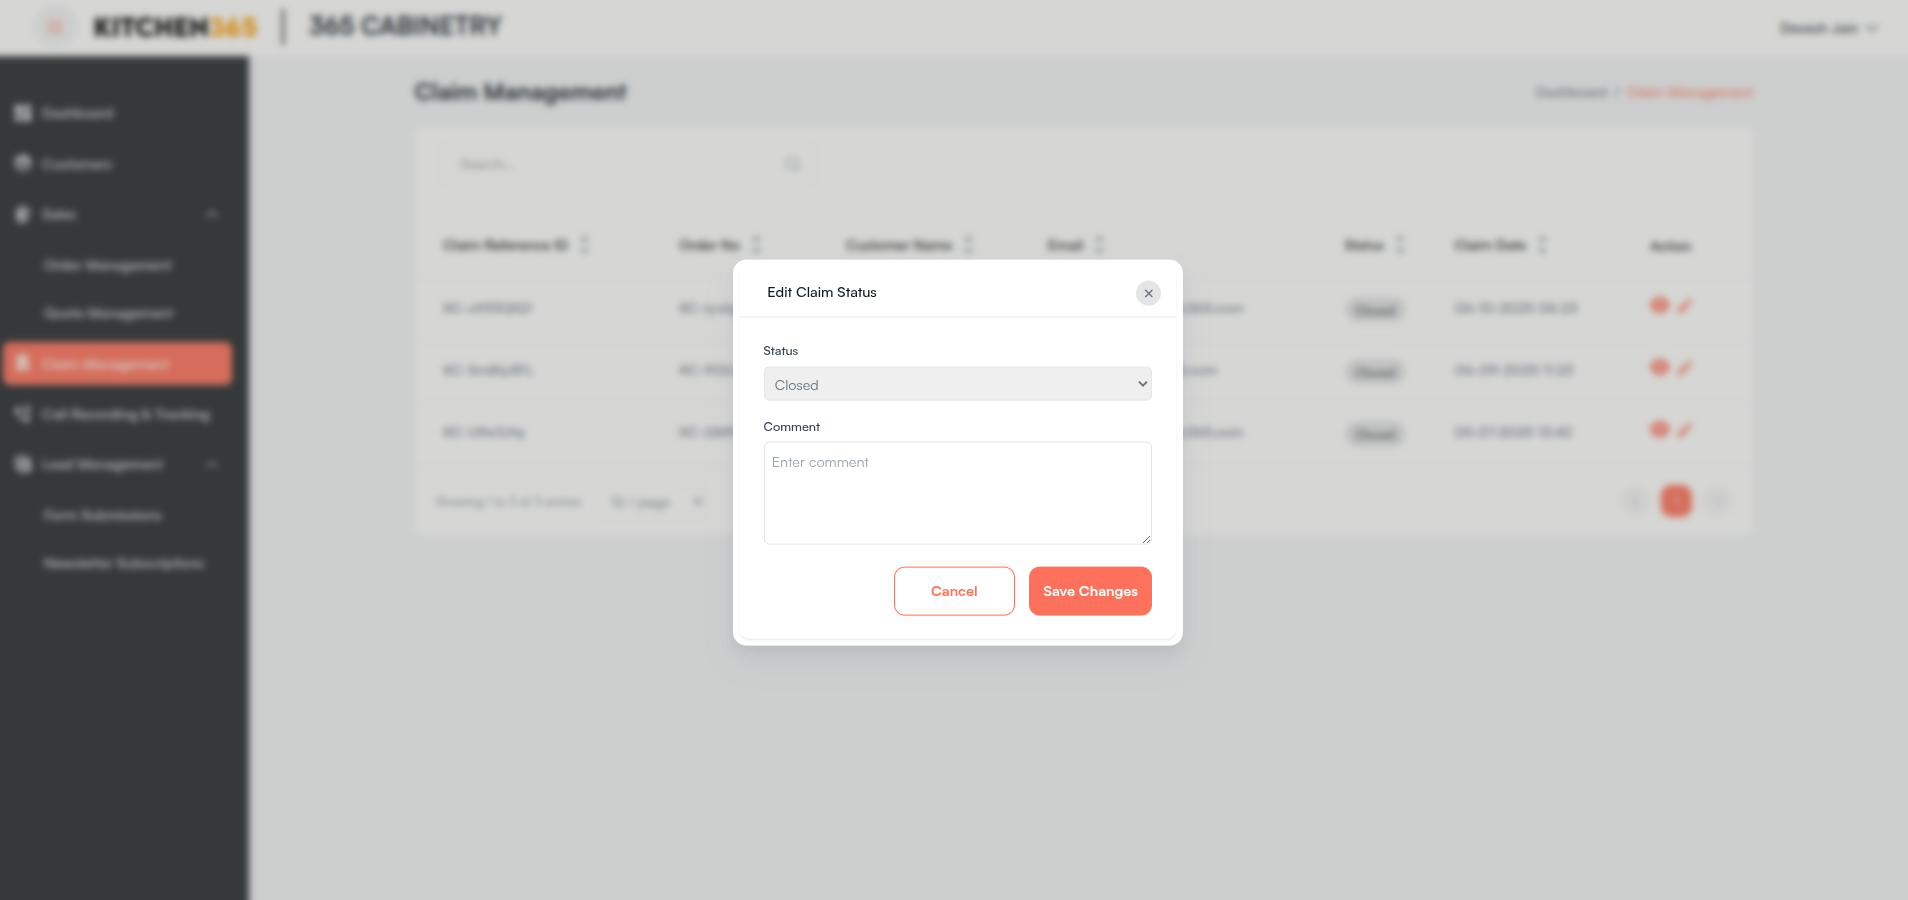
Click the ✏️ Edit icon on a claim row to open the edit popup and update the claim status.
| Field | Description |
|---|---|
| Status | Update the current claim status. |
| Comment | Add or edit a comment about the status change. |
| Button | Description |
|---|---|
| Cancel | Closes the popup without saving changes. |
| Save Changes | Saves the updated claim status and comment. |